Apparel & Accessories
•03 min read
-b4b0ee01-7102-4782-b4cc-72450eaeb58c.png&w=3840&q=75)
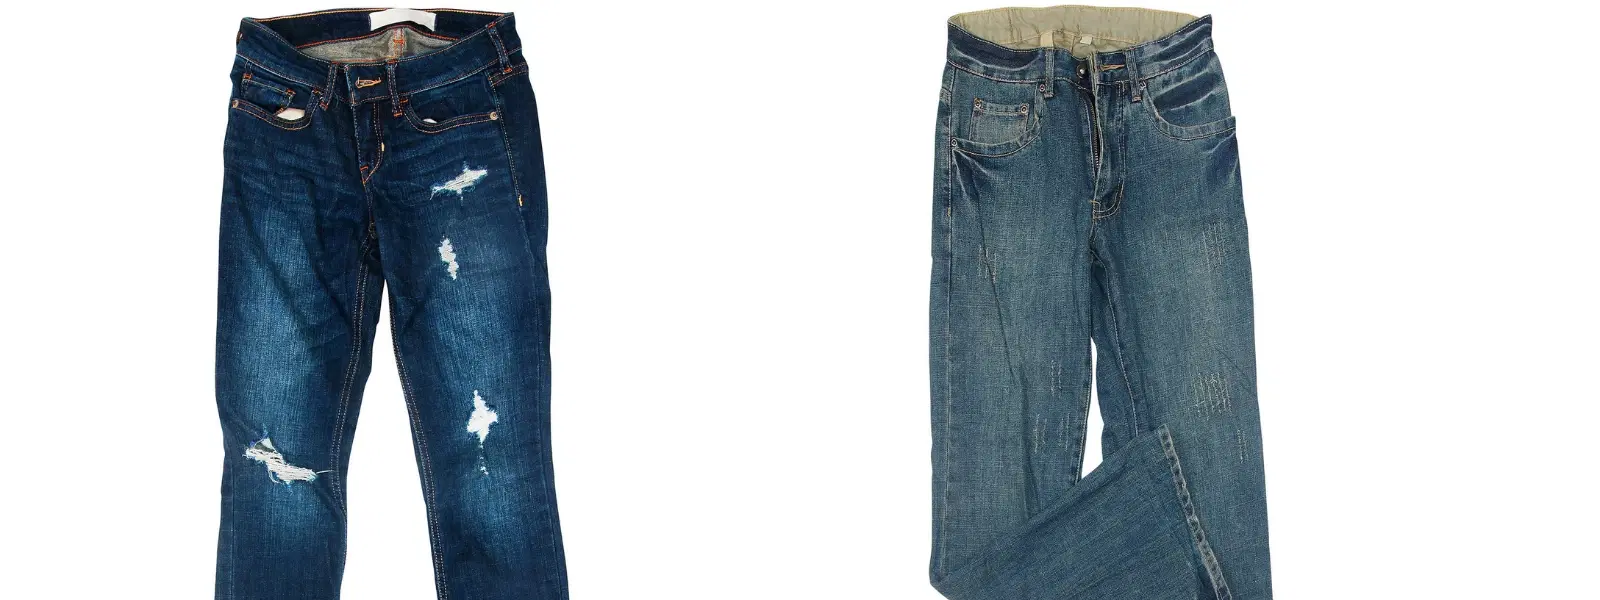
Ripping your jeans is more than just following a trend—it’s a creative journey of self-expression and style. In this guide, you will learn step-by-step how to rip your jeans at home, whether you are aiming for subtle frays or bold, eye-catching distressed looks. With clear instructions and easy-to-follow techniques, you will soon create your very own pair of DIY ripped jeans that match your personality and taste.
The first step to creating your perfect pair of distressed denim is to prepare your jeans. Choose a pair made of 100% cotton since they naturally fray and lend an authentic look to your creation. Consider the fit and color: skinny, straight-leg, or boyfriend jeans are great options, and lighter washes tend to highlight distressing more effectively. Avoid denim with too much stretch for a lasting and genuine appearance.
To start your DIY denim fashion project, gather the necessary tools:
- Scissors or a craft knife for cutting holes
- Sandpaper or a cheese grater for fraying the edges
- Tweezers to pull threads out for a natural finish
- Chalk or a fabric marker to outline your design on the jeans
Make sure your workspace is set up correctly. Lay your jeans flat on a stable surface like a table or the floor, insert a piece of cardboard inside to avoid cutting through both layers, and use natural lighting to clearly see your marks and cuts. This careful preparation sets the stage for a successful distressing process.
Before making any cuts, plan your design strategically. Identify natural wear zones for distressing—areas like the knees, thighs, and around the back pockets often show signs of aging in worn denim. It’s important to avoid high-stress areas such as seams, which might compromise the jeans’ durability if altered too much.
Sketch your design with chalk or a fabric marker. If you are new to customizing jeans at home, start with small, subtle rips and frays. Gradually, you can add larger cuts or more elaborate patterns as you get more comfortable with your DIY ripped jeans technique. This careful planning helps ensure the distressed denim tutorial results in a look that is both stylish and natural.
-961388ae-2e6f-4656-ab76-3780ab6a42c4.png&w=3840&q=75)
Now that you have your design mapped out, it’s time to get hands-on with how to rip your jeans. Using sharp scissors or a craft knife, carefully cut small horizontal slits along the marked areas. Start with one or two slits before expanding. With your fingers or tweezers, artfully pull out the vertical threads. This method creates a classic look by leaving the horizontal threads intact while introducing textured, ragged edges.
If you prefer a more subtle effect on your denim, try using sandpaper or even a cheese grater to fray the edges of pockets, hems, or pre-cut slits. This technique of how to fray denim offers a naturally worn and chic finish. For a truly casual style, consider cutting off the bottom hem and then using sandpaper to create a raw, undone look that screams effortless cool.
For those looking to refine their distressed denim skills, advanced techniques can add a unique twist to your look. One approach is using a disposable razor to gently scrape the surface of the denim for a faded and worn effect. This method of cutting holes in jeans enables you to achieve a delicate distress without fully severing the fabric. Another option is learning how to distress jeans by cutting precise slits and carefully pulling out only the blue threads while keeping the white ones intact, creating an eye-catching, textured finish. For further personalization, consider adding fabric paint, patches, embroidery, or even experimenting with bleaching sections of your jeans. Through these techniques, you are truly personalizing your denim styles with a creative, one-of-a-kind finish.
Expert Tip: Perfecting the Distressed Look
To achieve a truly authentic distressed look, focus on layering your techniques. Start with subtle fraying, then add small rips, and finally pull threads for texture. This approach ensures your jeans look naturally worn rather than artificially created.
Once you have successfully created your ideal pair of DIY ripped jeans, preserving their look is essential. Washing your jeans inside out on a gentle cycle helps maintain the distressed details. It’s best to avoid using a dryer; instead, let your jeans air dry to prevent further wear or accidental expansion of the rips. This care is an essential part of maintaining your custom denim fashion for a long time.
-68be3552-55c1-4572-9cbe-6f32de66a775.png&w=3840&q=75)
When it comes to preserving the look of larger rips, consider reinforcing them with fabric glue or carefully stitching along the edges. Handling your masterpiece with care while wearing or washing will ensure your personalized denim styles stay on trend for the long haul.
Cut small horizontal slits in the desired areas using scissors or a craft knife, then pull out vertical threads with tweezers to create a natural distressed look.
Use sandpaper or a cheese grater along the denim edges, particularly around hems, pockets, or pre-cut slits, to achieve a worn effect.
Gently scrape the denim's surface with a razor or sandpaper for a faded, worn appearance without cutting completely through the fabric.
Distressing your jeans at home offers a unique way to express your style and creativity. This DIY ripped jeans guide helps you navigate from early planning to detailed customization and caring for your finished piece. Embrace the art of making distressed jeans that resonate with your individuality and are made for those who love fashion as a statement of self-expression. Enjoy transforming a classic piece into something that reflects your personal journey in fashion.
