


7 Best Smart TVs for Seamless Streaming at Home

iPad Air vs MacBook Air: Which Device Fits Your Needs?
Mac Mini vs MacBook Air: Which Apple Device Fits You?
MacBook Air M2 vs M3: Which One Should You Choose?
MacBook Air vs Pro: Which One Fits Your Needs Best?
M1 vs M2 MacBook Air: Key Performance Differences Explained
Imagine transforming your living room into the ultimate entertainment hub with a smart TV that delivers stunning visuals, seamless streaming, and cutting-edge features. In this guide, we explore the top 7 smart TVs that promise an exceptional viewing experience, whether you are binge-watching your favourite shows or setting the stage for a cosy movie night. Read on to understand what makes a smart TV truly ideal for your home and how you can enjoy a seamless and immersive streaming experience.
Modern smart TVs offer a variety of features that enhance your streaming experience. With built-in streaming apps, such as popular global platforms, you can access a world of entertainment at your fingertips. These devices come with voice assistant integration and user-friendly interfaces that make navigation simple. Coupled with impressive TV resolution, a smart TV enriches your viewing with dynamic picture quality and smart tv streaming functionality.
When choosing a smart TV, the display is a top priority. A high-definition 4K TV ensures crisp visuals that bring every scene to life. Whether it is LED TV technology or other advanced display methods, the result is a flat screen tv with outstanding clarity and contrast. The right tv resolution and display technology provide a truly immersive experience, making your home entertainment one to remember.
Selecting the correct screen size is essential. Consider your room dimensions and seating arrangement to enjoy the best viewing angle. A flat screen tv not only offers a sleek look but can also be optimally fitted with a tv wall mount to ensure the perfect placement.
Reliable tv brands are known for their commitment to innovative technology, ensuring that your smart tv delivers consistent performance. Prioritise models that are recognised for their quality features and smart tv functionalities, so you are making an informed decision based on proven track records.
Enhance your home theatre tv setup by considering accessories that complement your smart TV. Whether it is a high-quality soundbar, a robust tv wall mount, or additional tv accessories, these add-ons ensure your viewing experience is elevated to the next level.
For those seeking premium performance and top-tier specifications, consider models that feature advanced AI capabilities and ultra-clear 4K tv resolution. Premium options offer self-lit pixels and infinite contrast, ensuring that you enjoy a truly immersive smart tv experience.
Mid-range models provide a balanced mix of affordability and features. Enjoy benefits like excellent tv streaming quality, smart tv interfaces, and efficient LED tv displays. These options are ideally suited for everyday viewing, delivering impressive performance without a high price tag.
If you are looking for a cost-effective solution, several budget-friendly options offer striking visuals and reliable performance. With affordable yet effective designs, these tv options deliver streaming capabilities that fit your lifestyle. They work well as a flat screen tv, accompanied by essential tv accessories to complete your home theatre setup.
Pro Tip: Optimize Your Smart TV Setup for Maximum Enjoyment
Did you know that pairing your smart TV with a high-quality soundbar and a tv wall mount can significantly enhance your viewing experience? A soundbar adds depth to your audio, while a wall mount ensures the perfect viewing angle for immersive entertainment. This simple upgrade can elevate your entire home theatre tv experience.
The best TV depends on your budget and specific needs. Some models offer premium features, while others are designed to be cost-effective without compromising on performance.
A TV is an electronic device designed for viewing visual content, often enhanced with modern features such as smart functionality, LED displays, and superior tv resolution.
The ideal TV should meet your unique requirements. Consider factors such as screen size, resolution, and additional smart features that enhance tv streaming and overall usability.
A 32-inch TV measures 32 inches diagonally, making it a good choice for smaller rooms or more compact living spaces.
Choosing the right smart TV can completely transform your home entertainment experience. By focusing on key features such as tv resolution, smart functionality, and compatibility with essential tv accessories, you can find a model that meets your needs. Whether you opt for high-end options for premium viewing, mid-range models for balanced performance, or budget-friendly alternatives, there is a smart tv waiting to enhance your streaming experience. With the ease and convenience of platforms like Tata Neu, you can shop smartly and earn NeuCoins rewards every time you choose quality and reliability, making each purchase a step towards a more connected and enjoyable life.
Choosing between the iPad Air and MacBook Air can feel like deciding between two tech titans. Both devices offer exceptional performance, yet each caters to different lifestyles and needs. In this guide, you will learn how these devices compare in design, performance, display, battery life, and overall value for money. By understanding their differences, you can make an informed decision that fits your work style, creativity, or day-to-day productivity.
The iPad Air and MacBook Air have distinct physical designs. The iPad Air is remarkably lightweight and compact, making it ideal for those who prioritise mobility. Its slim profile lends itself well to students, professionals on the move, or anyone who values a device that fits seamlessly into a busy lifestyle. The MacBook Air, whilst slightly larger, is engineered with portability in mind. Its dimensions and modern design mean it can easily be carried for work or study, making it a strong contender for those who need a device that bridges desktop power with mobile flexibility. Discussion about the macbook air portability and comparisons such as ipad air vs macbook specs ensure you have a clear picture of what each device offers.
Both devices exhibit a premium design that reflects quality and durability. The iPad Air boasts a sleek, minimalist tablet design with a focus on simplicity and elegance. In contrast, the MacBook Air features a refined laptop form, merging aesthetics with function. This makes them equally appealing, yet the choice truly depends on whether you prefer a touch-friendly tablet or a robust laptop with a full keyboard and trackpad.
The heart of both the iPad Air and MacBook Air lies in their advanced processors. Powered by M1 or M2 chips, these devices deliver smooth performance on everyday tasks and demanding applications alike. Whether it is multitasking or handling heavy workloads, the ipad air performance stands out during casual use while the macbook air features offer that extra edge for drivers seeking higher productivity. With a detailed ipad air comparison available, users can see how the specs align with their personal or professional requirements.
When considering productivity, the iPad Air offers innovative features such as compatibility with the Apple Pencil and Magic Keyboard. This combination transforms the tablet into a tool suited for creative tasks and note-taking, making it an excellent choice for those looking for an ipad air for productivity solution. Meanwhile, the MacBook Air with its macOS environment is optimised for a range of professional applications, from writing and designing to coding and video editing. Its robust setup makes it a popular option among macbook air for students and professionals who rely on a traditional laptop experience. For those weighing an ipad air vs laptop debate, the usability of each device plays a crucial role in the final decision.
Both the iPad Air and MacBook Air offer Retina displays that deliver excellent brightness, colour accuracy, and resolution. The smaller screen of the iPad Air provides an intimate viewing experience that is perfect for tasks like reading, quick sketches, or watching short videos. Conversely, the larger display of the MacBook Air is better suited for working on spreadsheets, detailed editing, and multitasking with multiple windows. The decision between these devices may rest on how much screen real estate you require for your daily tasks.
The choice between iPadOS and macOS significantly influences user experience. The iPad Air is driven by iPadOS, an operating system that simplifies touch interactions and enhances ease of use for casual and creative users. On the other hand, the MacBook Air operates on macOS, which caters well to users who need a more robust, desktop-like experience. This difference is often at the heart of debates such as macbook air vs tablet and ipad air vs macbook air specs for varying usage patterns.
Pro Tip: "Did You Know? The iPad Air paired with the Magic Keyboard and Apple Pencil can mimic many laptop functions, but the MacBook Air’s macOS ecosystem is better suited for professional-grade applications like video editing and coding."
When it comes to battery life, both devices offer endurance to get you through a busy day. The iPad Air is known for maintaining a steady battery life during extended use, making it ideal for travel or long work sessions. The MacBook Air, while also robust, is tailored for users who may demand a bit more power for extensive computing tasks. Comparisons such as macbook air vs ipad battery life help illustrate which device may be more suitable if battery longevity is a top priority.
Charging methods differ between the two devices. The iPad Air typically utilises USB-C, ensuring fast and efficient charging. The MacBook Air may offer varied charging capabilities, including modern connectivity options like MagSafe in some models. These distinctions mean that you should consider your daily charging routines and accessory compatibility when choosing between the devices.
Price is an important factor. The iPad Air is generally priced lower than the MacBook Air, although the final cost can increase with optional accessories like the Magic Keyboard or Apple Pencil. On the other hand, while the MacBook Air comes with a premium price tag, its value shines through with its integrated features that support high-demand professional tasks. Determining which device offers better value depends on your particular needs and budget.
For students who prioritise a lightweight device and creative tools, the iPad Air is a fantastic option. Professionals who require a versatile device for intensive applications might lean towards the MacBook Air. For those caught in the ipad air vs macbook specs debate, consider the features that matter most to your lifestyle. The thoughtful design and customer-focused services available on Tata Neu, including benefits like unexplored NeuCoin rewards, further enhance the purchasing experience by making every transaction rewarding.
The iPad Air supports touch-based input and works seamlessly with the Apple Pencil for tasks like drawing and note-taking, which the MacBook Air cannot replicate.
The iPad Air lacks a full desktop operating system, limiting its ability to run professional software like Final Cut Pro or advanced coding environments.
The MacBook Air is less portable than the iPad Air and does not support touch input, which may be a drawback for creative professionals.
Yes, the iPad Air is significantly lighter than the MacBook Air, making it more portable and easier to carry around.
In summary, the iPad Air and MacBook Air each shine in their own ways. While the iPad Air excels in portability, creative tasks, and touch-based interactions, the MacBook Air offers robust performance and a comprehensive operating system that supports professional needs. Understanding your priorities—whether it is productivity, portability, or budget—can help you choose the device that best fits your lifestyle. With Tata Neu's dedication to seamless shopping and rewarding NeuCoin benefits, you can enjoy not just quality technology but also a platform that values smart, thoughtful purchases.
Choosing between Apple’s Mac Mini and MacBook Air can feel like deciding between two equally brilliant stars in the tech galaxy. Both devices shine, however, they cater to different lifestyles. In this guide, we explore the design, performance, features, and overall value of the Mac Mini versus the MacBook Air, helping you understand which device fits your needs best.
The Mac Mini boasts a compact desktop form factor that is perfect for a modern workspace. Its minimalist design and subtle elegance make it an excellent addition to any office or home setup. When you consider the extensive mac mini features, its small size does not compromise performance. This design is ideal for those who prioritise a clean, organised environment.
The MacBook Air is celebrated for its sleek, lightweight build. Its stunning aluminium unibody construction and ultra-thin profile add a touch of sophistication while making it extremely portable. The macbook air design ensures that you can easily carry it from a café to a meeting, making it perfect for those constantly on the move.
When comparing a desktop with a laptop, the portability factor is crucial. While the Mac Mini represents a stationary, powerhouse desktop, the MacBook Air offers unmatched mobility. This desktop vs laptop Apple discussion underlines how each device serves a different purpose. Choose the Mac Mini if your work is primarily desk-based and requires robust connectivity options. Opt for the MacBook Air if you need a portable device to keep up with your dynamic lifestyle.
The Mac Mini is engineered for strong performance with efficient processing power, ample RAM options, and the ability to connect to external displays. It is widely admired in mac mini comparison reviews, especially when you look at the impressive mac mini specs. This device is very effective for productivity and creative endeavors, making it a reliable tool for multitasking and professional work. Its capacity for enhanced mac mini for productivity is a significant draw for home offices and studios alike.
The MacBook Air is powered by the latest M1/M2 chips, offering excellent performance along with remarkable battery life; a feature essential for long days on the go. Its performance balances power with portability, addressing everyday tasks such as document editing, browsing, and even light video processing. Reviews highlighting macbook air performance consistently praise the device for managing intensive activities while retaining superior macbook air battery life.
A side-by-side look shows that each device has its distinct strengths. The Mac Mini often outperforms in scenarios that demand several peripheral devices and extensive plug-in options. Meanwhile, the MacBook Air is engineered for a smooth and responsive experience in mobile work environments. Assessing mac mini vs laptop capabilities helps you determine the best fit for tasks ranging from gaming and video editing to office productivity.
Insight Corner:
Did You Know? The Mac Mini supports more external displays and offers significantly more ports than the MacBook Air, making it an ideal choice for professionals who need a multi-monitor setup.
The Mac Mini offers an impressive variety of connectivity options including HDMI, Ethernet, and Thunderbolt ports. Users benefit from these versatile connections, which enable them to hook up multiple external displays with ease. Such extensive mac mini features make it a powerful companion for creative and productivity tasks.
The MacBook Air shines with features tailored for portability. Its Retina display, Touch ID, and long battery longevity are key highlights. Though it comes with a more limited port selection compared to the desktop counterpart, it compensates with its superior portability, embodying the essence of macbook air portability.
Both devices run on macOS, offering regular updates and robust software compatibility. Whether you are into programming, video editing, or everyday browsing, both the Mac Mini and MacBook Air are equipped to handle a variety of requirements. Their compatibility with the latest apps and tools ensures they cater to all your professional and personal computing needs.
The Mac Mini provides an affordable option for users seeking a high-performance desktop. It offers excellent value for money with options that suit various budgets, including attractive educational pricing and customisation options. This affordability makes it a smart choice for setting up an efficient workstation.
On the other hand, the MacBook Air comes with a premium price tag, which is justified by its portability and long-lasting battery. Flexible monthly payment options and special savings for students further enhance its appeal for on-the-go users who demand both style and performance.
The decision ultimately comes down to your personal requirements. The Mac Mini excels as a cost-effective, high-performance desktop with diverse connectivity options while the MacBook Air is unmatched in offering a portable and stylish experience. Evaluating long-term value based on performance, features, and pricing will help you decide which device truly enhances your productivity and lifestyle.
The Mac Mini lacks portability and requires external peripherals like a monitor, keyboard, and mouse to function.
Yes, the Mac Mini can replace a laptop for stationary use, but it is not portable and does not include a built-in display or battery.
The Mac Mini is worth buying if you need a powerful desktop solution at an affordable price, especially for productivity and creative tasks.
In summary, the Mac Mini excels in performance, connectivity, and affordability, making it ideal for professionals and stationary setups. Meanwhile, the MacBook Air stands out with its portability, remarkable battery life, and refined design, which appeals to students and those with an on-the-go lifestyle. Reflect on your requirements and consider how each device aligns with your day-to-day tasks and aspirations. Explore the benefits of shopping smartly while enjoying rewards like NeuCoins on Tata Neu, where seamless shopping meets expert guidance and reliable after-sales support.
Apple’s MacBook Air lineup has long been a favourite among students, young professionals, and creatives alike. With the arrival of the new M3 chip, the debate on whether to upgrade from the M2 or stick with the trusted model is heating up. This article offers a comprehensive macbook air m2 vs m3 comparison, exploring design, performance, battery life, pricing, and upgrade options, so you can make an informed decision that fits your needs and budget.
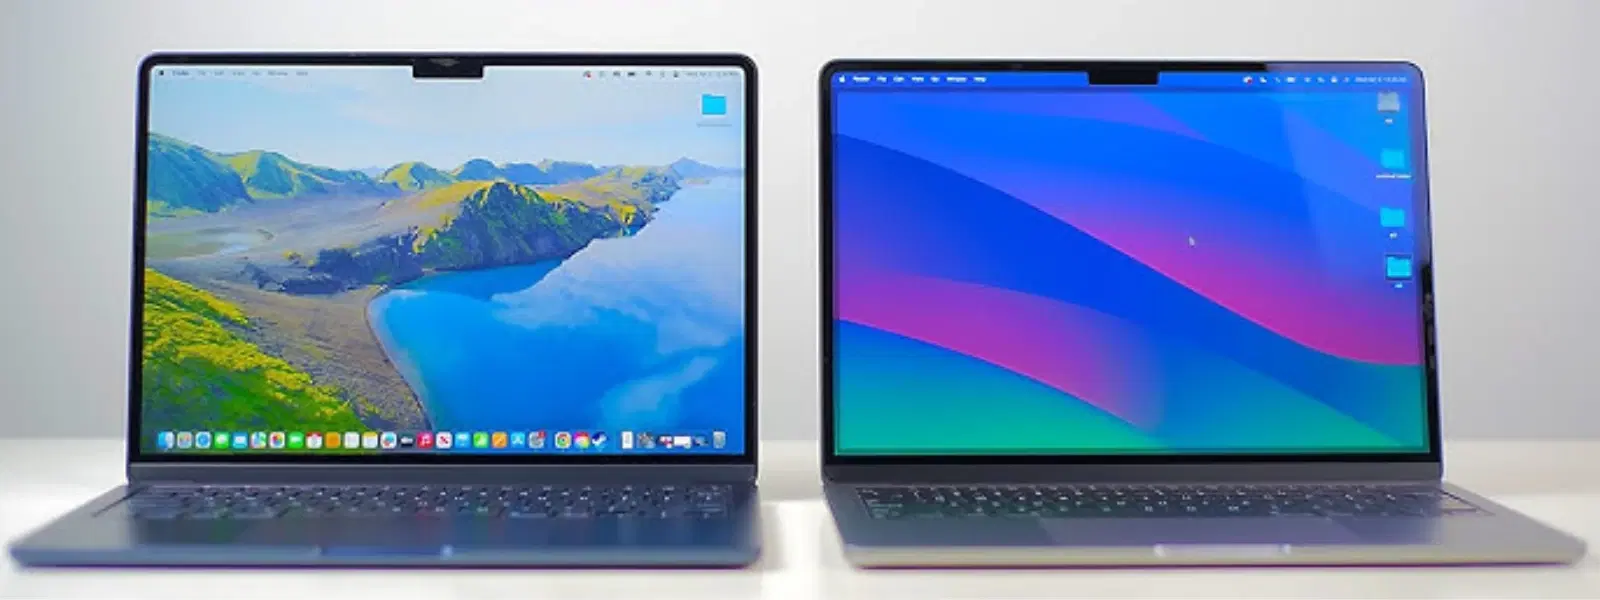
The MacBook Air M2 and M3 boast a sleek design with a focus on portability. In terms of weight and dimensions, both models are engineered for everyday use. The macbook air design comparison reveals that differences in weight are minimal, ensuring that portability remains a strong trait in both models. For those who value ease of handling during commutes or travel, both devices offer a nearly identical experience.
The M3 edition introduces subtle aesthetic updates that enhance its appeal. New colour options and slight refinements in material finish bring a modern look to the MacBook Air series while retaining the signature slim and lightweight profile adored by users. This differs from the M2, which continues with its classic appeal while delivering reliable performance.
An area where both models impress is the display quality. Detailed macbook air display quality assessments show that the M3 continues to build upon its predecessor's strong foundation with vibrant resolutions, impressive brightness levels, and refined technology for crisp visuals. Whether you are editing photos or streaming videos, both models offer a visual treat.
When comparing the macbook air m2 comparison with the new features of the M3, one finds interesting differences in their processors. The M2 chip is built with a 10-core GPU that delivers robust performance for everyday tasks. The M3, on the other hand, sports an 8-core GPU but benefits from a refined architecture that improves efficiency. This means that although the M3 uses fewer cores, its engineering allows for competitive performance especially in scenarios where energy efficiency is a priority. This macbook air processor differences analysis highlights that the M3 has been optimised for better power management and longevity.
Practical tests and m2 vs m3 speed test results indicate that the M3 stands up well in daily tasks and creative work alike. Benchmark tests suggest that its enhanced architecture provides a smooth experience, even when running demanding software. Users can comfortably run professional applications, graphic design tools, and other productivity software with either model. The subtle, behind-the-scenes differences in architecture ensure that performance is reliable and efficient.
For students and young professionals, both processors offer an excellent balance of performance and efficiency. Creatives and professionals who often perform heavy graphical tasks might appreciate the nuanced boost provided by the M3’s optimisations, while the M2 remains a sound option for those who prioritise cost-effectiveness and consistent performance. This clarity in m2 vs m3 performance ensures that each segment of users can choose a model that aligns with their lifestyle.
Battery longevity is a crucial factor when deciding between MacBook Air models. In this macbook air m2 vs m3 battery life review, both devices offer competitive usage durations. Whether you are browsing the web, watching videos, or tackling intensive tasks, each model delivers hours of productive use. The efficiency of the new M3 chip further refines battery performance, enabling longer usage periods without compromising performance.
The energy efficiency improvements in the M3 not only contribute to extended battery life but also improve heat management during prolonged usage. This creates a more comfortable user experience, particularly for those using their laptops in varied environments. The M3’s focus on reducing power consumption while maintaining high performance is a testament to Apple’s continuous commitment to innovation.
Pricing remains a pivotal factor for many prospective buyers. A close look at m2 vs m3 pricing reveals that differences in cost often reflect the subtle improvements in processor design and energy efficiency. The base configurations and upgrade options differ slightly between the two models, making it essential for buyers to weigh the benefits against their budget. With each device offering unique advantages, users can find a model that justifies their investment.
In a world where every rupee counts, the cost vs performance analysis shows that the M3’s enhancements offer a compelling case, particularly for those in need of future-proof technology. While the M2 remains a highly competitive option, the M3’s refined features and improved battery efficiency add significant value for tech enthusiasts and professionals who often rely on their devices for extended periods.
For those prioritising value, the choice hinges on individual needs. Budget-conscious buyers might lean towards the M2, which continues to impress with its reliability. Meanwhile, early adopters who cherish the latest technology might find the M3’s advancements in efficiency and performance well worth the extra investment. This clear macbook air upgrade options breakdown empowers informed decisions for various user profiles.
Deciding on an upgrade can be challenging. For users whose work demands a blend of efficiency and cutting-edge performance, migrating to the M3 can be a strategic move. However, if your current workflow is comfortably managed by the M2, then continuing with the familiar performance of this model might be the more pragmatic choice. Each option provides a robust experience, ensuring that you always have a reliable tool at hand.
While the focus here is on the MacBook Air, it is worth noting that Apple also offers other models that cater to specialised needs. Exploring alternative MacBook options may provide further insights into what fits best with your professional or academic requirements.
With continuous macOS updates and evolving technological landscapes, future-proofing remains an essential consideration. The M3’s enhanced technology, such as improved efficiency and the introduction of 3nm architecture, positions it as a long-term adopter for users who value staying ahead in today’s fast-paced tech environment. It is this forward-thinking approach that aligns with how Tata Neu supports smart and progressive shopping experiences.
Pro Tip: Understanding Apple’s Chip Naming Convention
Did you know? Apple’s M-series chips are built on ARM architecture, with each generation focusing on improved efficiency and performance. The M3 chip introduces 3nm technology, making it faster and more power-efficient than its predecessors.
The MacBook Air M2 weighs approximately 2.7 pounds, while the M3 maintains a similar profile, ensuring portability remains unchanged.
The M2 chip features a 10-core GPU, whereas the M3 chip employs an 8-core GPU with enhanced architecture for improved efficiency, even with fewer cores.
The M1 chip marked Apple's entry into ARM-based processing. The M2 built on that foundation with improved performance and efficiency. The M3 takes it further with 3nm technology, offering faster speeds and better power management.
In summary, both the MacBook Air M2 and M3 offer exceptional performance tailored to various needs. While the M3 provides cutting-edge technology with efficiency improvements and a future-proof design, the M2 continues to be a dependable choice for those seeking value and consistent performance. For customers who appreciate rewards like NeuCoins on Tata Neu, every smart transaction not only meets your tech needs but also enhances your overall shopping experience.
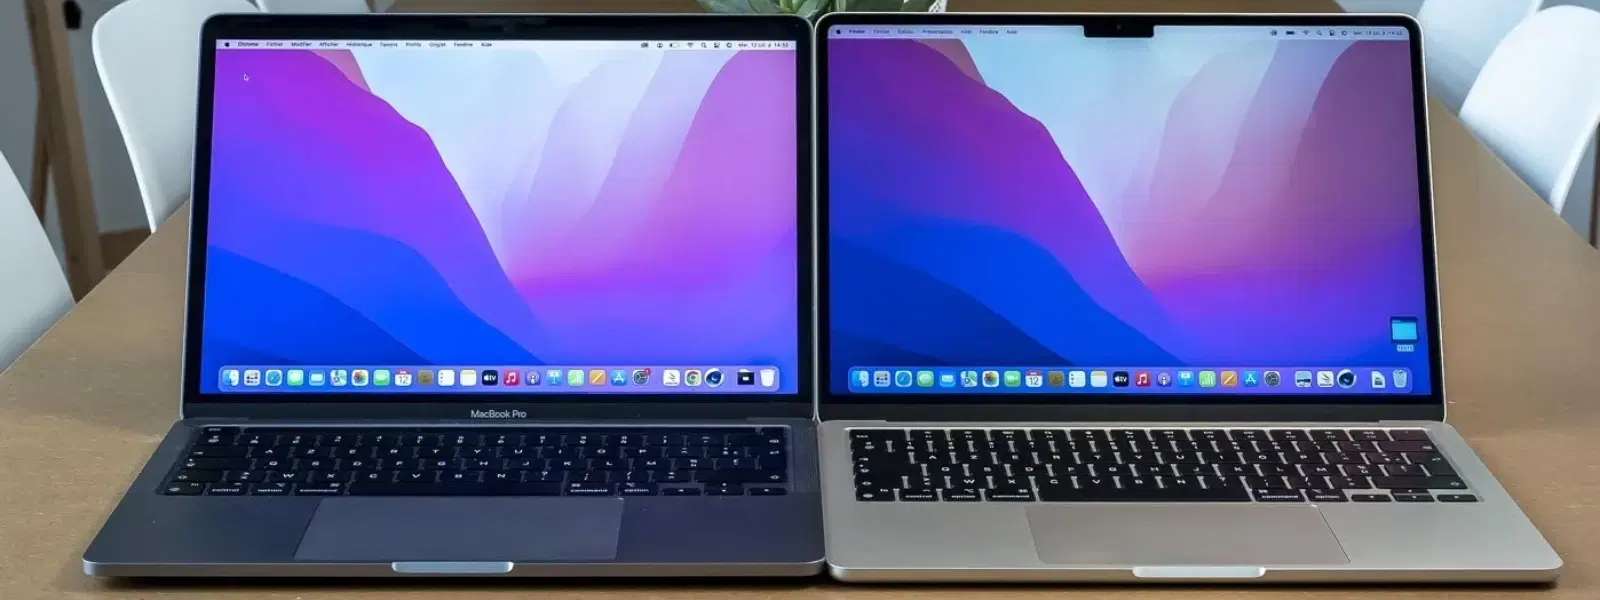
Choosing the right MacBook can feel like picking between two masterpieces—both exceptional, yet designed for different needs. In this post, we explore the unique features of the MacBook Air and MacBook Pro. By the end, readers will understand how these models differ in performance, design, display, portability, battery life, and pricing. Whether you are a student, professional, or casual user, this guide will help you determine which option suits your lifestyle best.
The MacBook Air is celebrated for its lightweight design and affordability. With a focus on portability and everyday performance, it is powered by the M2 chip and features a fanless design that ensures quiet operation. Many users appreciate its impressive macbook air performance, long-lasting battery, and practicality for daily tasks.
The MacBook Pro stands out with its advanced capabilities and robust performance. Featuring options like the M2/M3 Pro and M2/M3 Max chips, this model comes with larger storage capacities and an enhanced cooling system. It offers a range of macbook pro features that make it ideal for demanding creative and professional tasks.
When comparing the two, the MacBook Air shines in everyday use while the MacBook Pro is engineered for heavy-duty tasks such as video editing, 3D rendering, and software development. With its efficient M2 chip, the Air handles day-to-day demands with ease. For users needing more processing power, the Pro’s advanced chips set a new benchmark. This is a classic macbook air comparison scenario where users who demand more will lean towards the Pro.
The MacBook Air is perfect for web browsing, streaming, and light multitasking. Its smooth operation makes it a reliable choice for students and casual users. On the other hand, the MacBook Pro is built to run heavy workloads without lag. Its superior performance caters well to professionals who use resource-intensive software and require consistent speed and efficiency.
Both MacBook models feature stunning Retina displays that offer high resolution, brightness, and excellent colour accuracy. However, the MacBook Pro takes a step further with its superior XDR display and ProMotion technology, features that creative professionals will find invaluable. This direct macbook air vs pro display contrast assists users in deciding based on their visual needs.
Portability remains a significant advantage for the MacBook Air. Weighing as little as 2.7 pounds, it is ideal for on-the-go users such as students and frequent travellers. Conversely, the MacBook Pro, while slightly heavier, offers top-tier performance for those who work from a fixed location or need its enhanced capabilities. The distinction in macbook air vs pro portability is clear: choose the Air for ease of transport or the Pro for added power.
Battery longevity is a crucial factor for many users. The MacBook Air benefits from a fanless design, which contributes to its efficient battery use during daily activities. In contrast, the MacBook Pro provides a balanced blend of power and longevity, even during intensive tasks. This comparison makes the macbook pro vs air battery life debate an essential consideration for buyers.
When it comes to pricing, the MacBook Air offers an attractive entry point for those mindful of their budget. It is a favourite among students who are looking for performance without a hefty price tag. Meanwhile, the MacBook Pro comes at a premium due to its advanced features and higher performance capabilities. Potential buyers should consider their usage; the discussion on macbook air vs pro pricing helps in weighing value against cost.
For students, the MacBook Air is a sensible option. Its affordability, lightweight design, and long battery life make it a great companion for class notes, research, and multimedia consumption. When comparing macbook air vs pro for students, the Air generally meets the daily academic requirements without overburdening the student budget.
Professionals who work with graphic design, video editing, or engineering tasks frequently benefit from the MacBook Pro’s superior processing power and advanced features. If your work demands high performance and extensive multitasking, a deep dive into the macbook air vs pro for professionals discussion reveals that the Pro is a worthy investment for long-term productivity.
Insight Corner: "Did You Know? The MacBook Pro’s M3 Max chip can handle up to 96GB of unified memory, making it one of the most powerful laptops for creative professionals and developers."
The MacBook Pro is ideal for professionals who require high performance for tasks like video editing, 3D modelling, or software development.
The MacBook Air has a simpler cooling system and lower processing power than the Pro, which might not support very intensive tasks.
For most students, the MacBook Air is sufficient with its portability and affordability. However, students in creative fields may benefit from the advanced specifications of the Pro.
Opt for the MacBook Air if you prioritise portability and cost-effectiveness. Choose the MacBook Pro if you need superior performance and enhanced features.
In summary, the MacBook Air shines for casual users, students, and those who value portability and affordability. On the other hand, the MacBook Pro is tailored to professionals and power users who require advanced capabilities and enhanced performance. Your decision should reflect your specific needs and budget. Tata Neu offers seamless shopping experiences along with NeuCoins rewards. With express delivery available for orders placed before 6pm in selected locations, shopping smartly on Tata Neu lets you earn NeuCoins and enjoy expert guidance while taking home the tech that propels your next step forward in life.
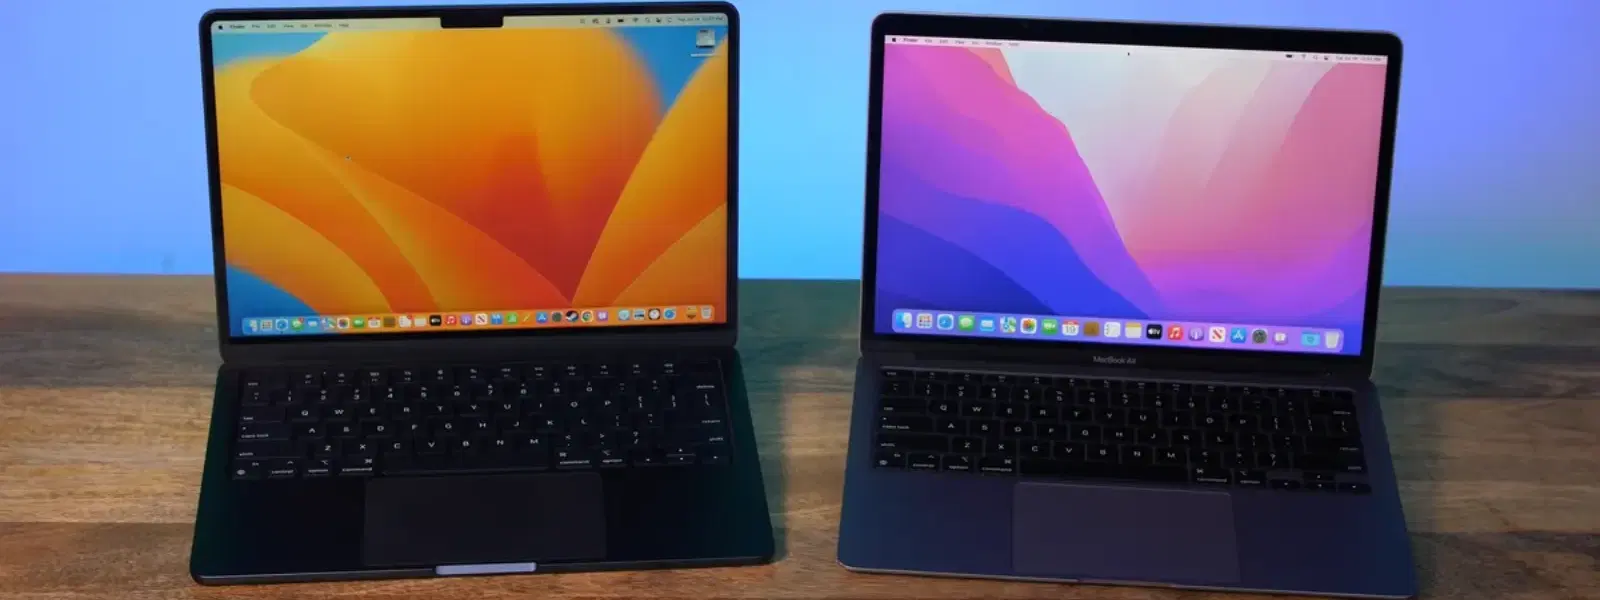
Apple’s MacBook Air lineup has long been a favourite for its sleek design, portability, and performance. With the arrival of the new M2 MacBook Air, many are asking: how does it compare to the acclaimed M1? This guide offers a detailed comparison of the M1 vs M2 MacBook Air. You will learn about performance benchmarks, design features, battery life and much more to help you make an informed decision based on your needs.
The M1 MacBook Air launched with a revolutionary approach to performance. Its introduction of the M1 chip marked a new era of energy efficiency and speedy benchmarks. Outstanding battery life and timeless design quickly made it a game-changer in the laptop market. For anyone searching for a reliable, high-performance laptop, our m1 macbook air comparison shows why this model remains a strong contender.
The M2 MacBook Air builds upon the success of its predecessor by embracing the advancements of Apple Silicon. With enhanced performance, refined aesthetics and new features, the M2 sets a higher benchmark. Its upgrades reflect improved processor speed and efficiency, making it a compelling option for tech enthusiasts and everyday users alike.
When comparing m1 vs m2 processor speed, the improvements in processing power of the M2 chip are evident. The M2 outperforms the M1 in everyday tasks such as multitasking, launching applications, and handling demanding workloads. Real-world scenarios, from creative editing to extensive productivity sessions, reflect these macbook air performance differences clearly.
The differences in graphics performance between the M1 and M2 models are significant. With additional GPU cores, the M2 MacBook Air offers smoother video editing and faster rendering, which is advantageous for tasks like gaming and graphic design. For those interested in macbook air display quality and creative applications, these upgrades deliver noticeable improvements.
The evolution from m1 chip vs m2 chip also includes advancements in the Neural Engine. The M2 chip's enhanced machine learning capabilities contribute to improved AI processing. This is particularly useful when handling complex computations in modern applications.
Insight Corner: Performance Upgrades
The M2 chip offers up to 18% faster CPU performance and up to 35% faster GPU performance compared to the M1, making it a better choice for power users seeking improved efficiency and speed.
The M2 MacBook Air introduces a thinner, lighter design that appeals to those who carry their device throughout the day. The updated aesthetics include new colour options and a modern look that adds a touch of premium style without compromising on reliability.
Examining the screen offerings reveals clear macbook air display quality differences. The M2 model features improved resolution and brightness. The addition of a notch, although a change from the previous design, introduces its own set of pros and cons that should be considered based on personal preference.
Connectivity has been enhanced in the M2 version with improvements such as updated USB-C ports and the reintroduction of MagSafe. This ensures more secure and efficient charging. Express Delivery is available in selected locations and for orders placed before 6pm, so always check availability.
Battery life remains a key consideration in the m1 vs m2 macbook air comparison. In tests measuring video playback and web browsing, both models offer excellent endurance, though the efficiency improvements in the M2 slightly extend battery life under heavy use.
When considering everyday usage for students, professionals, and casual users, the differences are subtle yet significant. The M2's efficiency cores and faster charging capabilities, coupled with MagSafe advantages, offer a balanced experience where reliable battery performance is crucial.
Both models offer various configurations to suit different budgets. With competitive pricing and upgrade options such as additional RAM and storage, the choice often comes down to individual needs. Clear understanding of macbook air performance differences and m1 vs m2 value for money can help in selecting the ideal option.
For students, the M1 MacBook Air is a budget-friendly option that delivers dependable performance for everyday tasks. On the other hand, the M2 provides enhanced multitasking capabilities and extra features that are beneficial for those studying creative disciplines or engineering. Our m1 vs m2 for students analysis shows that the right choice depends on both performance needs and budget considerations.
Looking at m1 vs m2 value for money, those on a tighter budget might prefer the tried and tested M1 model. However, if you are after the latest features and improved efficiency, the M2 is worth the extra investment. By weighing the price difference against the performance gains, users can determine which model is the best long-term investment.
The M1 is a great budget-friendly option for students who need a reliable laptop for basic tasks. The M2, however, offers better performance for multitasking and creative work, making it ideal for students in demanding fields like design or engineering.
If your current M1 MacBook Air meets your needs, upgrading may not be necessary. However, the M2 is worth considering if you require more power for professional tasks or desire the latest design features.
Yes, with Tata Neu you can earn NeuCoins on your tech purchases, adding extra value to your shopping experience while enjoying premium products.
In conclusion, both the M1 and M2 MacBook Air models offer outstanding value, each catering to distinct user needs. The M1 is ideal for those seeking a dependable, cost-effective option, while the M2 excels in design, speed, and advanced features for the power user. By understanding the key differences in performance, design, and value, you can confidently choose the model that aligns with your lifestyle and digital aspirations. Remember, with Tata Neu, you can enhance your shopping experience with NeuCoins rewards, ensuring you always shop smartly and stay ahead in the tech world.
%20(Presentation)%20(1600%20x%20600%20px)(493)-ff1f67e5-6d53-4932-aa95-be8b8c283afd.webp&w=3840&q=75)
Apple’s MacBook Air lineup has always been synonymous with sleek design and powerful performance, but with the introduction of the M2 chip, the stakes have been raised. In this post, we explore the key differences between the MacBook Air M1 and M2. By reading on, you will gain a clear understanding of whether the M1 or M2 MacBook Air is the right fit for your needs.
Apple began its journey from Intel processors to its own proprietary chips with the groundbreaking M1. This shift marked a new era in the laptop market, offering a blend of power and efficiency that set new benchmarks for performance and battery life.
The M2 chip builds on the success of the M1 by introducing a higher transistor count and improved efficiency. When considering the M1 chip vs the M2 chip, the upgrades in the M2 are clear. This chip delivers enhanced performance and is engineered for a smoother multitasking experience, making it a top choice for those who demand more from their devices.
When comparing MacBook Air M1 vs M2 in real-world scenarios, improvements in processing power are noticeable. The M2 chip offers markedly better performance in tasks such as video editing, gaming, and multitasking, which is evident in everyday activities. Whether you choose the M1 or M2, each offers its own strengths in handling everyday software demands.
Independent tests like those from Geekbench and Cinebench highlight the M1 vs M2 speed test outcomes. The M2 consistently shows faster results compared to the M1, offering quicker load times and smoother app transitions. These tests underline the advancements in the new chip's architecture.
Aside from performance, design is a crucial element. The differences between the two models become apparent in aspects such as weight, thickness, and available colour options. With a focus on convenience, the M2 model is slightly lighter and thinner. These MacBook Air design differences contribute to enhanced portability and ease of transit, appealing to those who travel frequently or work on the go.
The display in the MacBook Air models has also seen improvements. The macbook air display comparison highlights enhancements in screen technology, brightness, and resolution. These factors ensure a rich visual experience whether you are streaming media or editing photos. The refined display in the M2 version further defines its status as a premium device.
Battery life remains a key aspect for many users. Testing results for the macbook air battery life comparison reveal that both models perform well during continuous use such as web browsing, video playback, and productivity tasks. The M1 model, known for its energy efficiency, continues to be a strong choice for users who prioritise long-lasting performance.
The M2 chip is designed to optimise energy consumption while maintaining high performance. This means that despite delivering a more powerful experience, the M2 manages energy judiciously. This efficiency is particularly important for those who value both performance and portability.
Insight Corner: "Did You Know?"
While the M2 chip offers a 35% faster GPU and up to 18% faster CPU than the M1, the M1 MacBook Air remains one of the most energy-efficient laptops on the market, making it an excellent choice for users prioritising battery life.
The pricing tiers for the MacBook Air models vary based on configurations and storage options. Although the M1 model is generally more affordable, the M2 offers extra features and improved performance. When evaluating a MacBook Air M1 comparison, it is important to consider whether the higher cost of the M2 is justified by its features, such as those classified under MacBook Air M2 features.
For potential upgraders, a key part of the discussion is macbook air upgrade options. Factors such as overall performance improvement, design changes, and display quality should be weighed against the investment required. For young professionals and tech enthusiasts, the choice often comes down to whether the enhanced performance of the M2 fits their daily demands.
Shoppers looking for the latest in technology and rewards may also want to keep in mind the benefits available on Tata Neu. With NeuCoins rewards gaining traction, every transaction on Tata Neu or at affiliated outlets brings extra value. The platform is committed to delivering express delivery and reliable support, making every shopping decision smarter and more rewarding.
The M2 chip offers better performance and efficiency than the M1, making it ideal for demanding tasks like video editing and gaming.
Yes, the M1 MacBook Air still provides excellent performance and battery life at a more affordable price point.
Many modern laptops offer comparable performance, but the optimisation provided by Apple’s hardware and software in the M1 makes it unique.
Yes, the MacBook Air M2 is slightly lighter and thinner than the M1 model, which enhances portability.
In summary, both the MacBook Air M1 and M2 have distinct strengths. The M1 shines with its energy efficiency and affordability, while the M2 stands out in performance and design enhancements. Whether you prioritise long battery life or cutting-edge features, this comparison should help in guiding your purchase decision. Every shopping experience on Tata Neu is designed to be seamless and convenient, ensuring you receive expert guidance along with rewarding benefits such as NeuCoins, making smart, efficient shopping a reality.