Apparel & Accessories
•05 min read
-b4b0ee01-7102-4782-b4cc-72450eaeb58c.png&w=3840&q=75)
Ripped jeans have become a timeless fashion statement, blending edgy style with effortless comfort. In this guide, you'll learn how to rip jeans with scissors step-by-step while exploring DIY techniques that allow you to create a custom pair of distressed denim right at home. Whether you're interested in DIY ripped jeans or exploring unique scissor techniques for ripped jeans, this guide is designed to help you personalize your denim and express your style confidently.
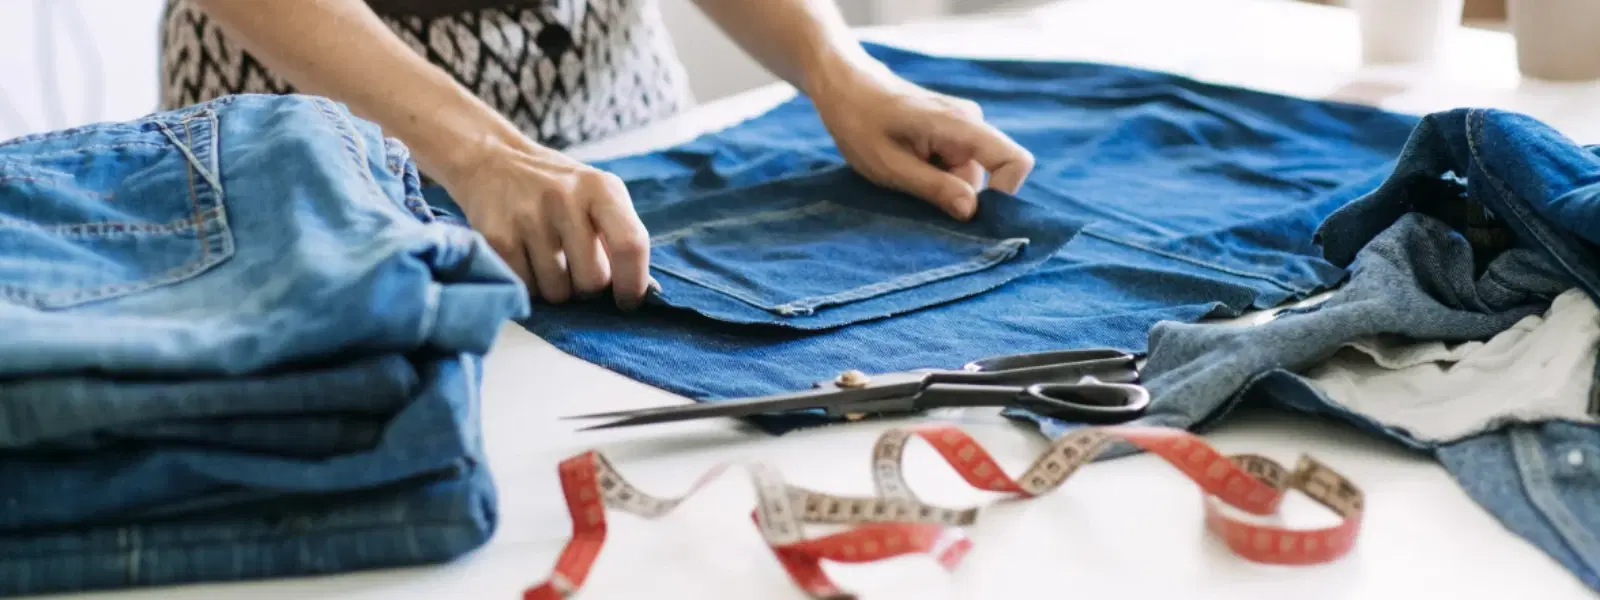
Before you begin customizing your denim at home, it's essential to select the right pair of jeans and gather the proper tools. Choose jeans made of 100% cotton or a cotton blend, as these materials naturally fray and create an authentic distressed look. Light-wash or medium-wash jeans work best because their fading enhances the ripped effect. Avoid stretchy denim that may not sustain the ripping design. Along with your favorite pair, make sure you have a sharp pair of scissors, chalk or a fabric marker, and a flat workspace. Optionally, having sandpaper, tweezers, or even a razor can offer extra distressing effects. Experts also suggest washing and drying your jeans prior to starting, as this softens the fabric and eases the ripping process.
Once you have your tools ready, wear your jeans and mark the areas you want to rip using chalk. Focus on natural wear spots such as the knees, thighs, or around the back pockets. Marking these spots can help you avoid over-ripping the fabric and allows you to gradually increase the number of cuts as you build your style. This careful planning sets the stage for a flawless DIY distressed denim project.
Creating the perfect distressed look is easy when you break the process into clear steps. First, prepare your workspace by laying the jeans flat on a sturdy surface. Insert a magazine or a piece of cardboard between the layers of the jeans to ensure you only cut the outer fabric. This method lets you control how to make distressed jeans without accidentally damaging the inner layer.
Next, make your initial cuts. Use scissors to create small horizontal slits along the pre-marked areas. Remember to start small with your initial cuts and gradually widen these slits for a more natural effect. Varying the length and spacing of the cuts enhances the appearance of homemade distressed jeans. After making the cuts, pull gently at the threads near the slits using tweezers to create frayed jeans edges. For an even softer, worn-in look, you can rub the edges with sandpaper. This technique is a cornerstone for cutting jeans for a distressed look and elevates your DIY project.
Finally, add the finishing touches by distressing other areas such as the pockets or hemlines using a razor or additional sandpaper. Washing the jeans after this process helps soften the material further and deepens the frayed details, giving your custom piece a polished yet vintage appeal.
For fashion enthusiasts ready to elevate their technique, consider advanced methods that tune your personal aesthetic. You can start by creating frayed edges at the bottom of your jeans by cutting off the hem with scissors to achieve a raw edge. Further distress the bottom with a bit of sandpaper or a razor to embrace a boho-inspired look. Another fun trick is achieving the white thread effect: make two parallel cuts and use tweezers to selectively pull out the vertical threads. This approach leaves the white horizontal threads intact, resulting in a refined, professional finish that demonstrates expert scissor techniques for ripped jeans.
-961388ae-2e6f-4656-ab76-3780ab6a42c4.png&w=3840&q=75)
You might also experiment with bleach or fabric paint to add an extra edge. Using bleach carefully can create a faded, tie-dye effect that complements the distressed style. Alternatively, fabric paint or patches allow you to mix customization with a personal artistic flair. These techniques not only help in how to distress denim perfectly but also ensure that each pair of jeans tells its own unique story. Such advanced tips for ripping jeans with scissors inspire you to transform everyday denim into pieces that speak of creativity and individuality.
Expert Tip: Mastering the Art of Natural Rips
For the most authentic distressed look, focus on areas where your jeans naturally wear out over time, such as the knees, thighs, and back pockets. Experiment with different scissor techniques for ripped jeans to enhance these naturally frayed edges. Pair your finished piece with a simple top or a stylish jacket to let your custom details shine.
Even experienced DIY enthusiasts can improve their approach by avoiding a few common mistakes. Over-ripping the fabric is one pitfall; avoid making cuts too close together as this can weaken the denim, leading to excessive tearing with regular wear. It’s always best to gradually increase the number and depth of cuts while constantly evaluating the progress. Additionally, using dull scissors may result in jagged cuts that ruin the intended look. Make sure you always have a sharp pair of scissors ready to ensure clean and precise cuts that truly enhance the rad, distressed effect.
Another aspect to be mindful of is not testing your method on a less favorite pair before committing to your preferred jeans. Experiment on an older pair to refine your technique, ensuring you gain confidence in how to make distressed jeans without any second thoughts. Such practical tips for personalizing ripped denim help you safeguard your best pieces and perfect the craft before moving to the primary pair.
Once your jeans are looking stylishly distressed, it's time to showcase your creation with outfits that elevate your look. Ripped jeans can be effortlessly paired with a casual white t-shirt and sneakers for an everyday chic appearance. For a more dressed-up vibe, try combining them with a sleek blazer and heels, lending an edgy yet polished look perfect for various occasions. Your customized jeans can easily transition from daywear to evening attire by simply adjusting your accessories.
The beauty of DIY customizations lies in their versatility. Experiment with seasonal styling by pairing your ripped jeans with an oversized sweater and ankle boots during winter, or a breezy crop top and sandals during summer. This adaptability ensures you not only refresh your wardrobe but also express your personal style through carefully curated ensembles. Each look is a testament to both the art of DIY ripped jeans and the power of self-expression, crafted with a blend of traditional Indian aesthetic and the fresh, innovative flair that defines our approach to fashion.
-68be3552-55c1-4572-9cbe-6f32de66a775.png&w=3840&q=75)
The best way to rip jeans is by using sharp scissors for controlled cuts, followed by fraying the edges using tweezers or sandpaper for a natural, worn look.
Yes, scissors are a simple yet effective tool for ripping jeans. Using sharp scissors ensures clean cuts and minimizes accidental damage to the fabric.
After making initial cuts with scissors, use a razor to scrape and distress the fabric further, which intensifies the worn effect.
Ensuring even spacing involves marking the fabric with chalk and using a ruler to guide your cuts before fully committing to the ripping process.
By making two parallel cuts and using tweezers to pull out only the vertical threads, you can retain the white horizontal threads for a refined finish.
Ripping jeans with scissors is not only an enjoyable DIY project but also a fantastic way to breathe new life into your old denim. With clear steps and creative techniques, you can achieve a range of distressed looks – from subtle frays to bold rips that perfectly reflect your unique style. This guide has shown you how to rip jeans with scissors effectively while integrating tips for DIY ripped jeans and customizing denim at home. Experiment with these methods to make ripped denim a true extension of your personality and stay ahead in fresh, on-trend fashion backed by the reliability and aspirational experience of our exclusive private labels.
