Consumer Electronics
•06 min read

<p>Danger can overpower you at any time and your voice will not be enough in such situations to get the required aid. The amazing new <strong>Juvo PSB01 Personal Alarm</strong> is crafted for all ages and is a necessary precaution from all kinds of danger. It rings a very loud alarm at 120 dB as well as flashes the torch to warn people nearby about a danger. Whether you have a medical emergency or you are attacked by predators your voice may not be heard but this alarm will be enough to deter attackers or draw attention of people close by to give you the immediate assistance required.</p> <p><strong>Extremely Easy To Use</strong></p> <p>The <strong>Juvo PSB01 Personal Alarm</strong> is small and portable, can be attacked to even a keychain if you want. To start the siren all you need to do is separate or pull the metal key chain from the main black unit. The siren may go on for 1 1/2 hours in case nobody heard it in the first minutes. This is very important for girls returning home alone at night as it acts as a security anti-attack panic alarm that is sure to scare off a molester. Its easy portability accentuates its use.</p> <p><strong>Lights Your Way</strong></p> <p>The little and portable <strong>Juvo PSB01 Personal Alarm</strong> also features a small LED torch that helps you find your way in the dark. Don’t be scared of dark alleys when you have this with you because it is equipped to save you from all dangers.</p>
Ever wondered how to seamlessly boot Ubuntu from a USB drive and unlock its full potential? Whether you are a tech enthusiast or a curious beginner, mastering this process is simpler than you think. In this guide, you will learn the complete process of creating a bootable USB for Ubuntu, configuring boot settings, and troubleshooting common issues to ensure a smooth experience.
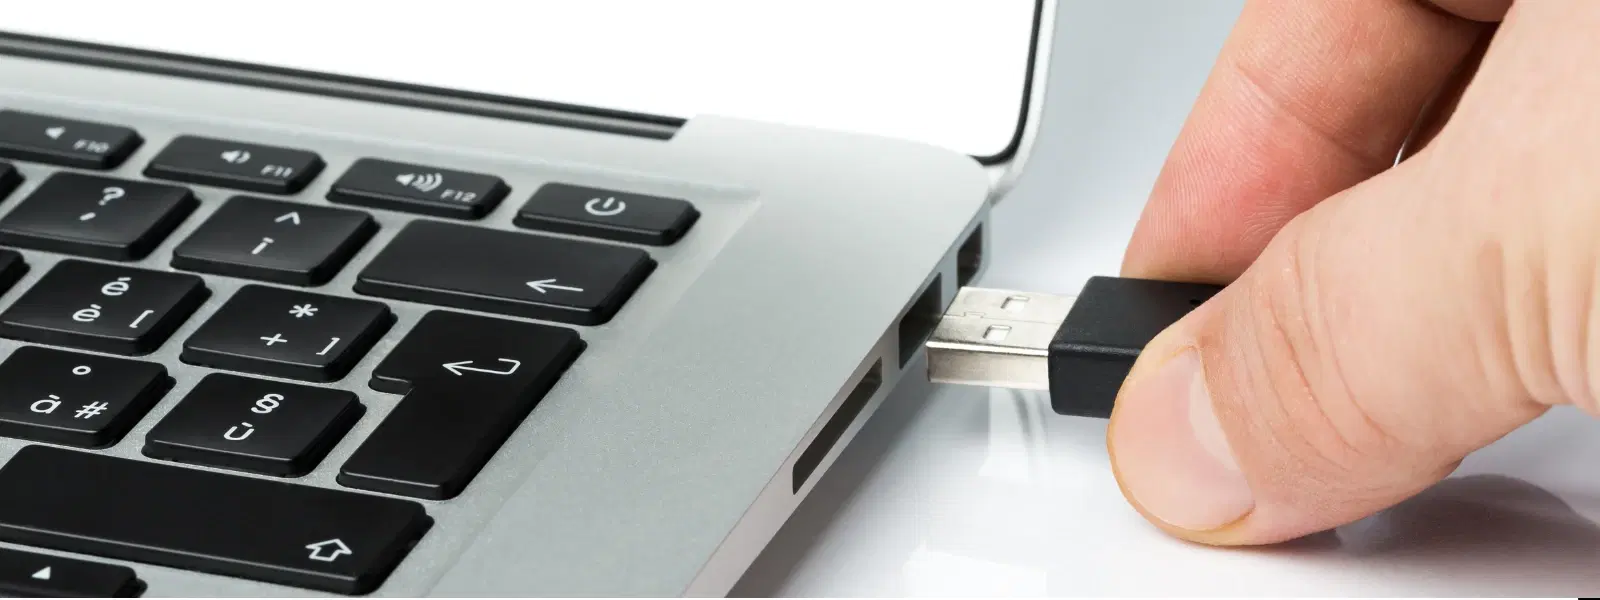
USB boot is the process of starting up a computer using an operating system stored on a USB drive rather than a traditional hard drive. This method allows you to test or install Ubuntu without making any changes to your existing system. Using a USB drive means you do not risk compromising any personal data or configurations already in place.
There are several compelling reasons to opt for booting Ubuntu from a USB drive. If you are looking to try out Ubuntu without altering your current operating system, a live USB session lets you explore the OS safely. Moreover, it is an excellent tool for troubleshooting issues on a computer when a full installation isn’t advisable. With Ubuntu’s versatile range of features, you can also use it as a portable OS when travelling or when your primary system fails.
The portability and flexibility of a USB bootable drive is unmatched. It offers a safe testing ground that preserves existing operating systems while providing a rapid setup compared to traditional installations. Additionally, this method ensures that you get a hassle-free trial experience, which allows thoughtful decision making when you choose to invest in a full installation later on.
Before you start, make sure you have a few essentials: a USB drive with a minimum of 8GB capacity, the Ubuntu ISO file (for instance Ubuntu 24.04), and a reliable tool to create a bootable USB. Tools such as Rufus, Startup Disk Creator, or Etcher are popular options that work efficiently for this purpose.
It is important to download the correct Ubuntu version suitable for your system. Ubuntu 24.04 is a robust option, built for both newer and somewhat older hardware. Always verify that the ISO file is compatible with your system's architecture to avoid any compatibility issues during the boot process.
There are several tools available to create a bootable USB. Rufus offers an intuitive interface and a quick setup experience, making it a favourite among many users. Alternatively, the Startup Disk Creator on an existing Ubuntu system provides a hassle-free method directly from the OS. Each tool has its advantages, so choose the one that best fits your comfort and system requirements.
Launch Rufus and insert your USB drive. Select the downloaded Ubuntu ISO file and adjust the settings (make sure to use a file system such as FAT32 for optimal boot speed). Once configuration is complete, click start to write the image to your USB drive. Every step in the process is clearly outlined in Rufus, making it accessible for beginners and experts alike.

<b>Why Buy Environics Device Disinfector</b><ul><li><b></b> for optimised disinfection</li><li><b></b> makes sure all the germs are killed</li></ul><p>To prevent harmful bacteria and fungi from getting in contact with you, buy <b>Environics Device Disinfector</b>. The usability of your device disinfector may be affected if its installation is complex. As this device disinfector has the it prevents the extra-spill and wastage of sanitizer. Your residence and office will stay clean and hygienic with products from this device disinfector that have 99.99% high resistance against germs and viruses. </p><p>The <b>Environics Device Disinfector's</b> price is cost-effective so you don't have to adjust your budget. The longer it takes for the device disinfector to disinfect, the longer you will have to wait. As a result of its efficient and effective operation, this device disinfector requires only to inject. Your device disinfector needs to have the latest technology to make sure it kills all the germs. As this device disinfector has the to prevent viruses, you can rest assured. Purchase the <b>Environics Device Disinfector</b> online at this instant!</p>
If you already run Ubuntu, the Startup Disk Creator utility is a built-in solution that simplifies the process. Simply open the tool, choose the ISO file and the target USB drive, and let it run automatically. The interface is straightforward, guiding you through each step with visual cues that minimise the chances of error.
Did You Know? Selecting the right file system, such as FAT32, during the USB creation process not only ensures wide compatibility but can also significantly enhance boot speed. Always double-check your system's requirements before finalising the setup to avoid any delays or complications during boot up.
Once your bootable USB is ready, you must access your system's boot menu. This is usually done by pressing a function key such as F2, F12 or the ESC key immediately after powering on your computer. The exact key can vary depending on your device’s manufacturer, so it might help to check your manual if you’re unsure. For systems using BIOS or UEFI, following on-screen instructions carefully will allow you to select the USB drive without difficulty.
When you boot from the USB drive, you are typically presented with a couple of options: you can either choose the "Try Ubuntu" live session or proceed with an "Install Ubuntu". The live session is a feature-rich trial mode that doesn’t affect your current system, while the install option lets you set up the OS permanently. Depending on your needs for testing or full installation, pick the option that works best for you.
After selecting the install option, you will be guided by a user-friendly installation process. Begin with language selection and then move on to partitioning your drive. For many, the safe choice is an automated partition that erases the disk; however, advanced users can opt for manual setup. The process also includes creating a user profile and setting a secure password. Once these steps are complete, the installation will finalise, and subsequent reboots will load the new Ubuntu system smoothly.
Sometimes, the bootable USB may not be detected due to various reasons like a corrupted ISO file or improper USB creation. If you encounter an error message or the USB drive fails to appear in your boot menu, begin by verifying the USB drive’s health and ensuring the ISO file was downloaded correctly. It is important to repeat the creation process if any issues are found.
For more stubborn cases, delve into your system’s BIOS/UEFI settings. Enabling the 'Legacy Boot' option in BIOS can resolve compatibility issues, especially with older hardware. Additionally, reformatting the USB drive and recreating the bootable media using a different tool may rectify any lingering issues.
Expert Tip: If your system fails to boot from the USB drive, consider enabling 'Legacy Boot' in your BIOS settings or updating your motherboard firmware. These additional steps often address compatibility challenges with older devices. Taking a methodical approach to troubleshooting will enhance your technical proficiency while ensuring your system remains uncompromised.

<p><b>HEUV Technology</b><br/><br/>Thanks to the HEUV technology, the SVARAS Home X2 Pro UV Steriliser effectively targets and eliminates a wide range of viruses and bacteria, including those responsible for illnesses such as the coronavirus. As a result, you can have peace of mind knowing that you can effectively protect yourself and your family from potential health threats.<br/><br/><br/><b>Enhanced Sterilisation</b><br/><br/>This rechargeable UV steriliser provides optimal sterilisation capabilities, which eliminates harmful germs. This high level of effectiveness makes it an ideal choice for homes, offices, and shops, ensuring that surfaces remain clean and safe. Thus, you can trust this steriliser to protect your health and the health of your loved ones by efficiently disinfecting various surfaces.<br/><br/><br/><b>User-Friendly Functionality</b><br/><br/>This home steriliser boasts convenient features that enhance its usability. It includes a voice alarm that signals when the sterilisation process is complete, ensuring you never forget to turn it off. Additionally, the device offers a safe automatic power-off feature, which enhances safety during operation. Convenient charging capabilities further simplify the user experience, which makes it easy to keep the steriliser ready for action.<br/><br/><br/><b>Eco-Friendly Design</b><br/><br/>Designed with sustainability in mind, this SVARAS steriliser promotes an eco-friendly lifestyle. It operates without mercury or harsh chemicals, which makes it safe for both users and the environment. This design choice allows you to maintain a clean living space while reducing your ecological footprint. Moreover, the sleek, modern appearance of the steriliser ensures that it complements any decor.</p>
An Ubuntu Live USB allows you to try the operating system without installing it on your hard drive, providing a risk-free environment to explore its features. This solution is ideal if you simply wish to experience Ubuntu’s desktop environment, run essential applications, or test hardware compatibility.
Using Ubuntu Live USB, you can enjoy a fully functional desktop environment with the ability to run many applications and tools. It offers a comprehensive taste of Ubuntu's capabilities, including its user-friendly interface and advanced features. Additionally, experimenting with Ubuntu through Live mode can be a critical step before making any permanent installations.
For the best performance, consider setting up persistent storage if you plan to use the live session frequently. Persistency allows you to save session data, ensuring that your adjustments and personal files are not lost after each reboot. However, it is advisable to avoid running heavy applications continuously to prevent undue wear on the USB drive.
This guide not only serves as an expert overview on how to boot Ubuntu from a USB drive but also represents a broader vision of utilising technology to enhance everyday computing experiences. Much like the seamless shopping experiences on Tata Neu, where every transaction could earn you NeuCoins rewards, mastering Ubuntu installation empowers you to make smarter, more informed decisions about your technology. Just as Tata Neu offers unmatched ease and reliability in shopping, this guide provides you with a trustworthy and clear path to explore one of the most versatile operating systems available today.
Enter your system’s BIOS/UEFI settings at startup by pressing keys like F2, F12, or DEL, then select the USB drive as the boot device and save your changes.
Create a bootable USB using tools such as Rufus or Startup Disk Creator, insert the USB into your system, and choose it from the boot menu.
Restart your computer and press the appropriate key, such as F12 or ESC, to access the boot menu. The specific key depends on your device's manufacturer.
After booting from the USB drive, follow the guided installation process by selecting the language, partitioning your drive, setting up user accounts, and confirming your settings to complete the installation.
Mastering the process of booting Ubuntu from a USB drive empowers you to explore, test, and install one of the most versatile operating systems with ease. With a step-by-step guide covering every aspect from creating the bootable drive to troubleshooting common issues, this comprehensive approach ensures that you are well-equipped to unlock new possibilities in your computing journey. Much like the transformative experience offered by Tata Neu, where every transaction can contribute towards earning and enjoying NeuCoins rewards, this guide strives to deliver an insightful, trustworthy, and approachable resource that puts you in control of your technology.
