Consumer Electronics
•04 min read

<p>Danger can overpower you at any time and your voice will not be enough in such situations to get the required aid. The amazing new <strong>Juvo PSB01 Personal Alarm</strong> is crafted for all ages and is a necessary precaution from all kinds of danger. It rings a very loud alarm at 120 dB as well as flashes the torch to warn people nearby about a danger. Whether you have a medical emergency or you are attacked by predators your voice may not be heard but this alarm will be enough to deter attackers or draw attention of people close by to give you the immediate assistance required.</p> <p><strong>Extremely Easy To Use</strong></p> <p>The <strong>Juvo PSB01 Personal Alarm</strong> is small and portable, can be attacked to even a keychain if you want. To start the siren all you need to do is separate or pull the metal key chain from the main black unit. The siren may go on for 1 1/2 hours in case nobody heard it in the first minutes. This is very important for girls returning home alone at night as it acts as a security anti-attack panic alarm that is sure to scare off a molester. Its easy portability accentuates its use.</p> <p><strong>Lights Your Way</strong></p> <p>The little and portable <strong>Juvo PSB01 Personal Alarm</strong> also features a small LED torch that helps you find your way in the dark. Don’t be scared of dark alleys when you have this with you because it is equipped to save you from all dangers.</p>
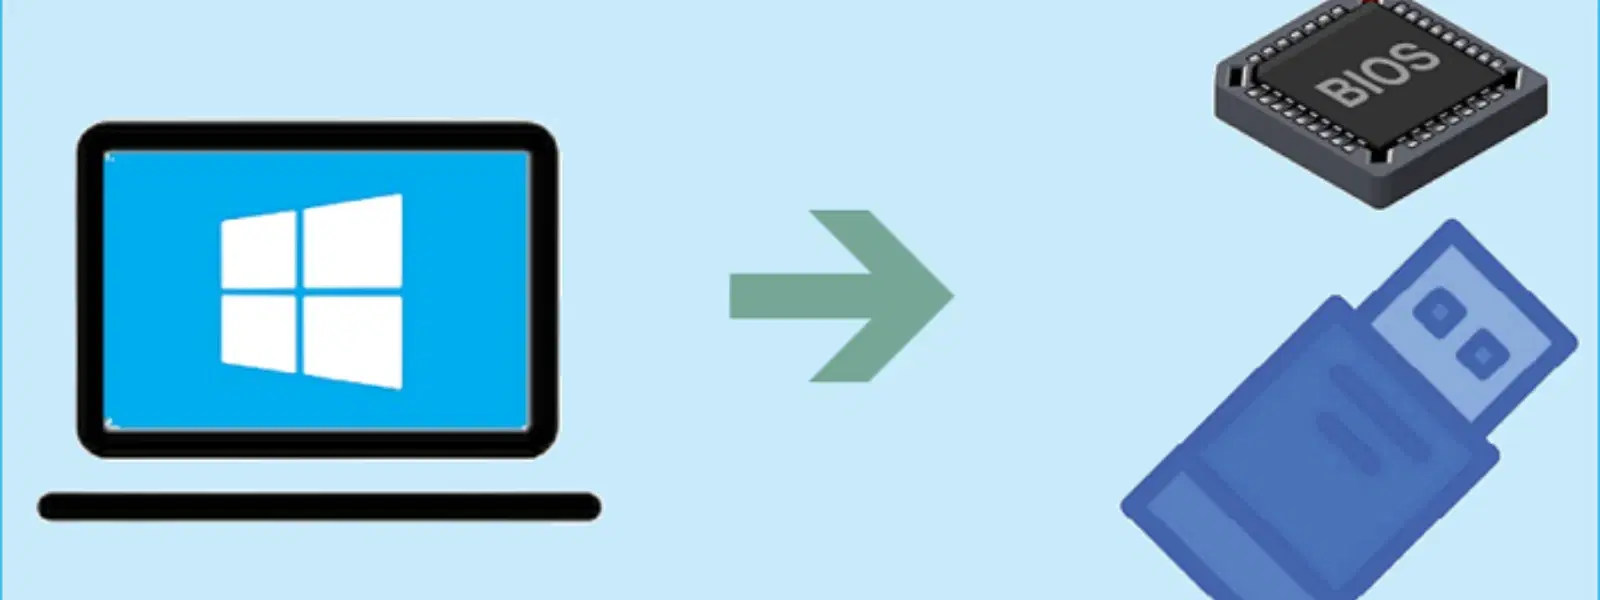
Ever wondered how to bypass traditional installation methods and boot Windows 7 directly from a USB? This process is simpler than you might think, provided you have a clear understanding of each step involved. In today’s post, we walk you through mastering USB booting—a method that offers portability, speed, and ease of use for your Windows 7 setup. Whether you’re recovering a system or installing a fresh copy on a device without an optical drive, this guide will equip you with all the essential information.
USB booting is a method that allows your computer to load its operating system from a USB drive. This means that you can install or repair Windows 7 even without a DVD drive at your disposal. The benefits are clear: faster installation speeds, convenience on the go, and the flexibility to carry your system installation with you. It dispels many common myths about reliability and highlights a perfect solution for modern computing needs.
The first step is to create a bootable USB. You can accomplish this by using established tools such as Rufus or even command prompt methods. Begin by downloading a legitimate Windows 7 ISO file. It is important to verify the authenticity of the ISO to ensure there are no corrupt files and to maintain system integrity.
Once your ISO file is ready, the next step is configuring your USB drive. Check if your drive is formatted correctly—a choice between FAT32 and NTFS may have implications on compatibility with both BIOS and UEFI systems. Partitioning your drive correctly ensures that the system recognises and boots from the USB without any issues.
Accessing your device’s BIOS is the gateway to setting up USB boot. When your computer starts up, you typically press keys like F2, DEL, or ESC depending on your manufacturer to enter the BIOS menu. Once inside, you need to navigate gently through the interface to locate the boot settings.

<p><b>Versatile Fabric Care</b><br/><br/>Perfectly suited for families of 8-10 members, the Whirlpool 360 BLOOMWASH Pro 360 BW PRO-H 95 kg 9.5kg Fully Automatic Top Load Washing Machine provides a convenient and efficient laundry solution. Additionally, with over 13 wash programs, including Daily, Heavy, Delicates, Whites, Woolens, Anti-Bacterial, and more, it ensures effective cleaning for various fabrics.<br/><br/><br/><b>360-Degree Bloomwash</b><br/><br/>Employing a 360-degree Bloomwash technique, this washing machine ensures a thorough and comprehensive cleaning, leaving your clothes fresh and spotless.<br/><br/><br/><b>Stainless Steel Spa Drum</b><br/><br/>The powerful Spa Drum in this washing machine effortlessly manages heavy loads, from bedsheets to thick curtains. Furthermore, engineered from high-quality stainless steel, it adds a layer of sturdiness and durability to your washing machine.<br/><br/><br/><b>740 RPM Spin Speed</b><br/><br/>Boasting an enhanced Power drying and a high 740 RPM spin speed, this fully automatic washing machine ensures that your clothes come out drier after each wash cycle, saving you time and energy in the drying process.<br/><br/><br/><b>Built-in Heater</b><br/><br/>Thanks to its built-in heater, this washing machine can help tackle tough stains and eliminate allergens for effective, hygienic cleaning.<br/><br/><br/><b>Dual Lint Filter</b><br/><br/>Designed with a high-quality Dual Lint Filter, this washing machine catches small fabric pieces or wet paper remains during the wash cycle, ensuring that your garments come out tidy and odour-free.<br/><br/><br/><b>Ample Energy Savings</b><br/><br/>Boasting a 5-star energy rating, this Whirlpool washing machine is designed for energy efficiency, making it a practical and environmentally conscious choice for your household.<br/><br/><br/><b>Responsive Controls</b><br/><br/>You can easily adjust the wash settings with the responsive Touch Controls of this washing machine, ensuring a hassle-free laundry experience for your household. Moreover, you can navigate through the intuitive digital LED display, which offers simplicity and ease of use for a wide range of users.<br/><br/><br/><b>Child Lock</b><br/><br/>The Child Lock function provides a reliable way to safeguard this washing machine from unauthorised use, making it an ideal choice for families with curious kids.<br/><br/><br/><b>Hot Catalytic Soak</b><br/><br/>The hot catalytic soak mechanism immerses clothes in concentrated detergent water to loosen dirt before agitation, using 1/3rd the quantity of water to create a high detergent concentration.<br/><br/><br/><b>Removes Up to 48 Hours Old Stains</b><br/><br/>No need to worry about immediate stain removal. With the Stainwash program, one can remove stains that are even 48 hours old.<br/><br/><br/><b>Durable Build</b><br/><br/>The soft closing lid of this washing machine is engineered with a user-friendly design, allowing for easy opening and closing.<br/><br/><br/><b>Anti-Rat Technology</b><br/><br/>With Anti-Rat technology, this washing machine remains resilient against rodent attacks, safeguarding its internal components against potential damage.</p>
After entering the BIOS, adjust your boot order so that the USB drive is prioritised. This may involve moving the USB device up the list. A simple visual walkthrough within the BIOS interface may be all you need. Remember to save your changes before exiting the BIOS to ensure your computer attempts to boot from the USB drive on restart.
With your bootable USB prepared and BIOS settings adjusted, the next stage is the boot process. As the computer starts, it first checks the USB drive for the operating system files. If everything is correctly set, you will see the Windows 7 boot screen. During this process, some errors may pop up, usually due to minor misconfigurations. Ensure that all settings have been double-checked if you encounter any issues.
Once the USB drive successfully boots the system, the Windows 7 installation process begins. You will be guided to choose key settings, such as partitioning your drive and selecting language preferences. This method proves excellent on selected devices that offer Express Delivery of services and expert guidance for seamless support. As you install, make sure you configure settings that best suit your needs while keeping a clear focus on system performance.
If you experience issues such as the system not recognising the USB or encountering boot failures, there are a few solutions you can try. First, revisit your BIOS settings to confirm that the USB is set as the primary boot device. Also, verify that your USB drive is compatible with the system’s standards. Sometimes reformatting the drive and recreating the bootable USB can resolve unforeseen errors.
For those who wish to undertake more advanced configurations, consider enabling legacy boot mode or exploring third-party utilities designed for boot management. These advanced settings are particularly useful if you plan to maintain a dual-boot configuration, allowing you to keep your existing operating system alongside Windows 7. Each adjustment should be made with caution and backed by an understanding of your system’s capabilities.
Pro Tip: Optimize Your USB Boot Configuration for Speed
Did you know that using USB 3.0 drives for booting can significantly reduce setup time compared to USB 2.0? Ensure your computer’s ports and BIOS settings support USB 3.0 for faster installation and smoother performance.

<b>Why Buy Environics Device Disinfector</b><ul><li><b></b> for optimised disinfection</li><li><b></b> makes sure all the germs are killed</li></ul><p>To prevent harmful bacteria and fungi from getting in contact with you, buy <b>Environics Device Disinfector</b>. The usability of your device disinfector may be affected if its installation is complex. As this device disinfector has the it prevents the extra-spill and wastage of sanitizer. Your residence and office will stay clean and hygienic with products from this device disinfector that have 99.99% high resistance against germs and viruses. </p><p>The <b>Environics Device Disinfector's</b> price is cost-effective so you don't have to adjust your budget. The longer it takes for the device disinfector to disinfect, the longer you will have to wait. As a result of its efficient and effective operation, this device disinfector requires only to inject. Your device disinfector needs to have the latest technology to make sure it kills all the germs. As this device disinfector has the to prevent viruses, you can rest assured. Purchase the <b>Environics Device Disinfector</b> online at this instant!</p>
Enter the BIOS menu, change the boot order to prioritise the USB drive, and restart your computer with the bootable USB inserted.
Access the BIOS or boot menu during startup—common keys include F2, F12, or ESC—then select the USB drive as the primary boot device.
Prepare a bootable USB with the Windows 7 ISO file, adjust BIOS settings to boot from USB, and follow the installation process displayed on your screen.
Press the designated key, often F12, F10, or ESC, during startup to access the boot menu and then select the USB drive.
Use specialised tools like third-party boot software to create a bootable USB that bypasses regular BIOS settings.
Mastering the art of USB booting for Windows 7 opens up a realm of convenience and flexibility. It empowers you with the means to address urgent installation needs with speed and confidence. With clear steps that include everything from preparing a bootable USB to adjusting your BIOS settings and troubleshooting potential issues, even first-time users can now tackle the process with ease.
Moreover, countless other conveniences await customers on trusted platforms offering expert guidance and rewards like NeuCoins, adding extra value for those who shop smartly. Systems and services provided by trusted experts continue to set new benchmarks in reliability and support, ensuring you always have a helping hand when navigating complex technical landscapes.
