Consumer Electronics
•04 min read

<p>Danger can overpower you at any time and your voice will not be enough in such situations to get the required aid. The amazing new <strong>Juvo PSB01 Personal Alarm</strong> is crafted for all ages and is a necessary precaution from all kinds of danger. It rings a very loud alarm at 120 dB as well as flashes the torch to warn people nearby about a danger. Whether you have a medical emergency or you are attacked by predators your voice may not be heard but this alarm will be enough to deter attackers or draw attention of people close by to give you the immediate assistance required.</p> <p><strong>Extremely Easy To Use</strong></p> <p>The <strong>Juvo PSB01 Personal Alarm</strong> is small and portable, can be attacked to even a keychain if you want. To start the siren all you need to do is separate or pull the metal key chain from the main black unit. The siren may go on for 1 1/2 hours in case nobody heard it in the first minutes. This is very important for girls returning home alone at night as it acts as a security anti-attack panic alarm that is sure to scare off a molester. Its easy portability accentuates its use.</p> <p><strong>Lights Your Way</strong></p> <p>The little and portable <strong>Juvo PSB01 Personal Alarm</strong> also features a small LED torch that helps you find your way in the dark. Don’t be scared of dark alleys when you have this with you because it is equipped to save you from all dangers.</p>
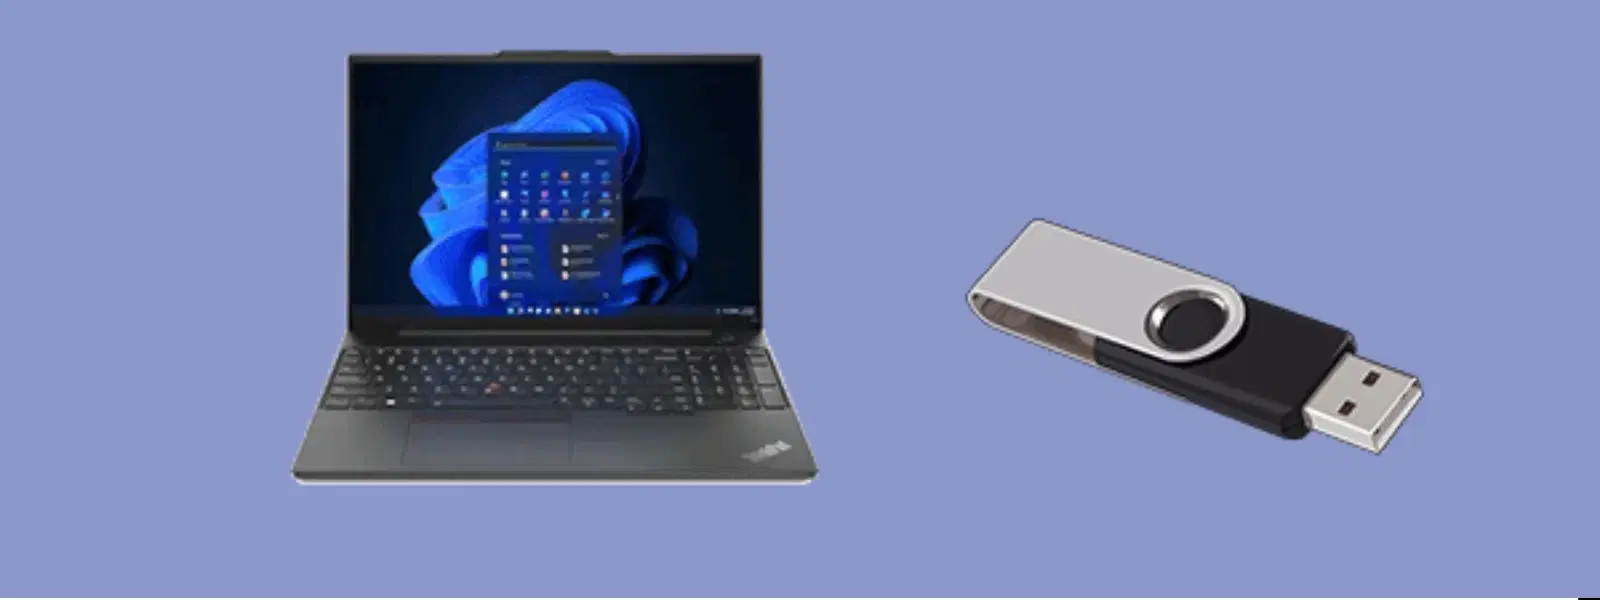
Ever wondered how to boot your Lenovo ThinkPad from a USB drive? Whether you are troubleshooting an issue, installing a new operating system, or running diagnostics, booting from USB can be a lifesaver. This guide offers a clear, FAQ-style approach to help you master the process, ensuring that your device works seamlessly and that you enjoy the additional benefits available on Tata Neu, like the opportunity to earn NeuCoins rewards as you shop smartly.
USB booting is the process of initiating your Lenovo ThinkPad from a USB drive rather than its internal storage. This technique is especially useful for various scenarios such as installing a new operating system, engaging in system recovery after an error, or running portable diagnostic tools without affecting your current system settings. It opens a pathway to a host of possibilities that make troubleshooting and system upgrades much more manageable.
Your device’s boot menu plays a pivotal role when it comes to booting from an external drive. The lenovo thinkpad boot menu is designed to allow you to select your preferred boot device temporarily, ensuring that you can navigate directly to your USB drive if needed. Understanding this menu is the first step toward tapping into advanced system functionalities with ease.
Before you can boot from USB, you must ensure your drive is properly prepared. Creating a bootable USB drive involves formatting the drive correctly and loading it with the necessary bootable files. Tools such as Ventoy or the Media Creation Tool can help you craft a reliable bootable USB tailored for your requirements. This procedure is often referred to as the usb boot setup lenovo laptop, and getting it right is crucial for a smooth boot experience.
An essential part of the process involves accessing the BIOS settings of your Lenovo ThinkPad. Typically, you can enter BIOS by pressing either the F1 or F2 key during startup, though this might slightly vary by model. Understanding how to access bios on lenovo thinkpad is fundamental because these settings allow you to modify boot options and ensure that your system recognises your USB drive as a valid bootable device.

<p><strong>Why buy Environics Enviroglobe Anti Radiation Ball for House & Car</strong></p> <p> </p> <ul> <li><strong>Provides E-Smog and Radiation Protection</strong> for healthier homes and families</li> <li><strong>It Covers A Radius</strong> of 250 sq.ft protect you and your loved ones from harmful radiation</li> <li><strong>Clinically Tested EMF Harmonizer</strong> that provides us 360-degree protection from radiation sources that are beyond our control</li> </ul> <p> </p> <p>Buy the <strong>Environics Enviroglobe Anti Radiation Ball for House & Car</strong> which is based on Envirochip’s radiation protection technology that helps you protect you and your loved ones from harmful radiation within an area of 250 sq. feet. You can extend the range of protection by placing multiple Enviroglobes at equal distances from one another. It is a clinically tested EMF harmonizer and provides us 360-degree protection from radiation sources that are beyond our control. Electromagnetic Radiation (EMR) refers to the constant waves of the electromagnetic field (EMF) produced by wireless communication devices such as mobile phones, laptops, Wi-Fi routers, and other sources such as mobile towers and high-tension wirelines, etc. However, The human body is accustomed to random waves and hence the constant exposure to electromagnetic radiation causes serious biological disorders such as higher stress and fatigue, irritation, headache, weakened immunity, cancer, fertility issues to name a few. The technology used in Enviroglobe changes the nature of electromagnetic radiation from constant to random waveform making it human body-friendly.</p> <p> </p> <p>When you get <strong>Environics Enviroglobe Anti Radiation Ball for House & Car</strong> online, you also get awesome companion for your home. It comes with Internationally tested and certified technology. No need of batteries or adaptors, you can simply charge by placing it under the sunlight, for only a couple of minutes every week. Enviroglobe is simple to use. Simply place it at your desk, table, living room, bedroom, car, office space, absolutely wherever you want, and get a radiation protected zone of up to 250 sq. feet. It provides e-smog and radiation protection for healthier homes and families. Purchase <strong>Environics Enviroglobe Anti Radiation Ball for House & Car</strong> online, now!</p>
Once in the BIOS, the next step is to enable the option for USB boot. Navigate to the USB configuration section of your BIOS settings and turn on the USB boot feature. Make sure this is saved before you exit the BIOS. This step, often known as enable usb boot lenovo thinkpad, is critical to ensuring your Lenovo ThinkPad recognises the external drive on start-up.
After enabling the USB boot option, it is important to adjust the boot order so that your Lenovo ThinkPad checks the USB drive before the internal drive. This reordering, sometimes described as change boot order lenovo laptop, guides the device to boot from the USB drive first if it is available. Carefully follow the instructions on your screen to move the USB drive to the top of the boot priority list.
In addition to changing the boot order, exploring your device’s other startup options can provide further control over the booting process. By understanding lenovo thinkpad startup options, you can easily switch between various boot modes and select the device you wish to boot from without making permanent changes to your BIOS settings. This flexibility ensures that you are equipped to handle any critical tasks that may arise.
Even a well-prepared system might encounter issues during the USB boot process. Common problems include the USB drive not being recognised, the incorrect boot order being set, or even the presence of corrupted boot files. When facing these challenges, revisit your BIOS settings and check that all configurations have been applied correctly. The process of troubleshooting usb boot on lenovo thinkpad often requires reformatting your USB drive or ensuring that you have the correct bootable files on it.

<b>Why Buy Environics Device Disinfector</b><ul><li><b></b> for optimised disinfection</li><li><b></b> makes sure all the germs are killed</li></ul><p>To prevent harmful bacteria and fungi from getting in contact with you, buy <b>Environics Device Disinfector</b>. The usability of your device disinfector may be affected if its installation is complex. As this device disinfector has the it prevents the extra-spill and wastage of sanitizer. Your residence and office will stay clean and hygienic with products from this device disinfector that have 99.99% high resistance against germs and viruses. </p><p>The <b>Environics Device Disinfector's</b> price is cost-effective so you don't have to adjust your budget. The longer it takes for the device disinfector to disinfect, the longer you will have to wait. As a result of its efficient and effective operation, this device disinfector requires only to inject. Your device disinfector needs to have the latest technology to make sure it kills all the germs. As this device disinfector has the to prevent viruses, you can rest assured. Purchase the <b>Environics Device Disinfector</b> online at this instant!</p>
If you experience difficulties, keeping some troubleshooting tips in mind can save you time and effort. Double-check that your BIOS settings have been correctly applied and that the USB drive itself is free from issues. Trying different USB ports can sometimes make a difference, and it is always beneficial to confirm that your bootable media is intact using recognised tools. These usb boot troubleshooting tips are designed to guide you through resolving common issues patiently and effectively.
Pro Tip: Double-Check Your Bootable USB Drive
Before attempting to boot from USB on your Lenovo ThinkPad, ensure your USB drive is properly formatted and contains the correct bootable files. Tools like Ventoy or the Media Creation Tool can make this process seamless.
Ensure your USB drive is properly formatted and contains the necessary bootable files. Access the BIOS settings, enable the USB boot option, and adjust the boot order to prioritise the USB drive.
Press the appropriate key, usually F12, during startup to access the Boot Menu on your Lenovo ThinkPad, allowing you to select the USB drive as the boot device.
Within the BIOS, locate the section for USB configuration and make sure that all USB ports are enabled so that the device can recognise your bootable drive.
To force the BIOS to boot from a USB drive, adjust the boot order to place the USB drive at the top of the priority list or use the Boot Menu to manually select the USB drive during startup.
This guide has provided a thorough overview of how to boot your Lenovo ThinkPad from a USB drive by addressing key elements such as understanding the process, preparing a bootable drive, modifying BIOS settings, and troubleshooting common issues. The advice provided is both practical and easy to follow, ensuring that even those new to the process feel confident. By following these steps, you can enjoy a smooth USB boot experience supported by Tata Neu's commitment to customer-first service and technology-enabled efficiency. Explore additional resources and informative guides to further empower your tech endeavours and continue enjoying the trust and rewards offered by Tata Neu.
