Consumer Electronics
•03 min read

<p>Danger can overpower you at any time and your voice will not be enough in such situations to get the required aid. The amazing new <strong>Juvo PSB01 Personal Alarm</strong> is crafted for all ages and is a necessary precaution from all kinds of danger. It rings a very loud alarm at 120 dB as well as flashes the torch to warn people nearby about a danger. Whether you have a medical emergency or you are attacked by predators your voice may not be heard but this alarm will be enough to deter attackers or draw attention of people close by to give you the immediate assistance required.</p> <p><strong>Extremely Easy To Use</strong></p> <p>The <strong>Juvo PSB01 Personal Alarm</strong> is small and portable, can be attacked to even a keychain if you want. To start the siren all you need to do is separate or pull the metal key chain from the main black unit. The siren may go on for 1 1/2 hours in case nobody heard it in the first minutes. This is very important for girls returning home alone at night as it acts as a security anti-attack panic alarm that is sure to scare off a molester. Its easy portability accentuates its use.</p> <p><strong>Lights Your Way</strong></p> <p>The little and portable <strong>Juvo PSB01 Personal Alarm</strong> also features a small LED torch that helps you find your way in the dark. Don’t be scared of dark alleys when you have this with you because it is equipped to save you from all dangers.</p>
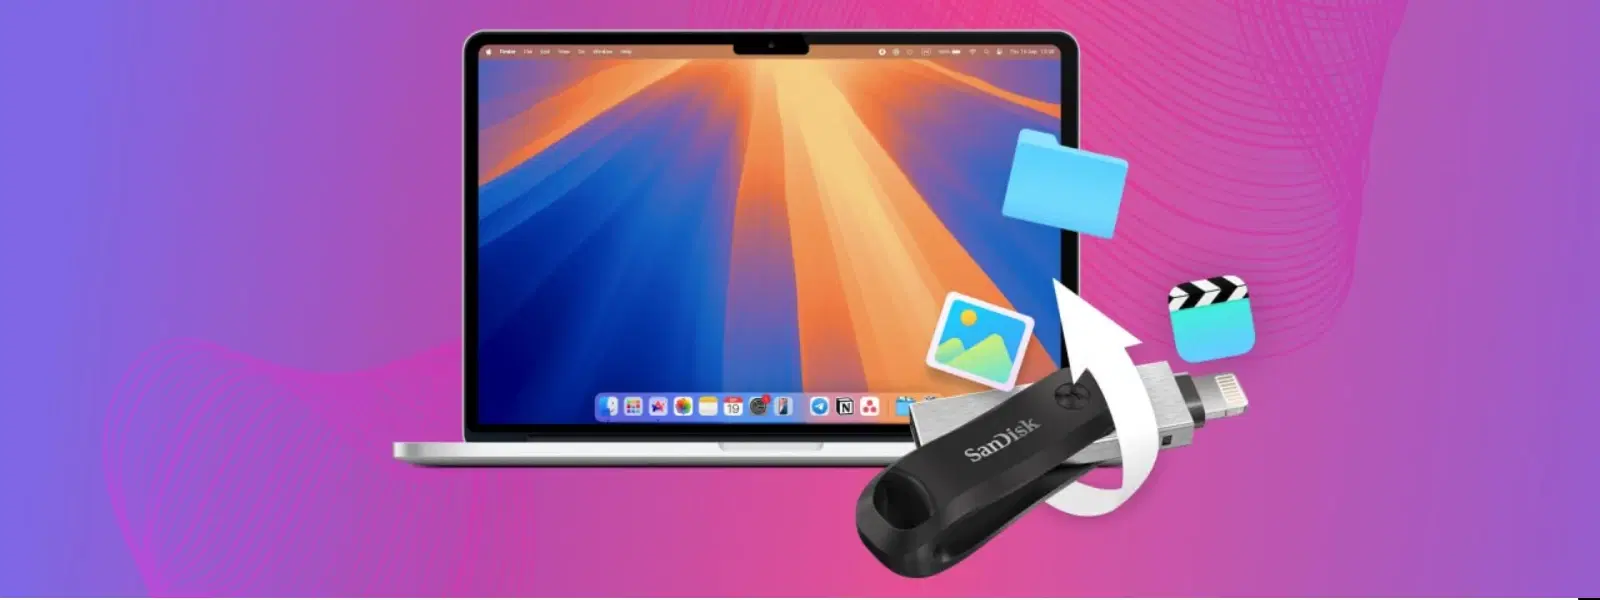
Whether you're preparing a USB drive for a new project or troubleshooting storage issues, formatting your USB drive on a Mac doesn't have to be complicated. This guide explains how to format a USB drive in Mac using simple steps outlined below and answers frequently asked questions around this topic.
Formatting a USB drive means erasing all the data on it and setting up a new file system. This process helps clear storage, change the USB drive file system on Mac, and ensure that your drive performs optimally. Essentially, when you format, you are preparing your USB drive for a fresh start.
Many users choose to format a USB drive on Mac for reasons like clearing storage, reformatting for Windows compatibility, or preparing the drive for a more secure file system. Using Mac's Disk Utility offers a straightforward path to change USB format on Mac, making it easy even for beginners.
Before you begin the reformatting process, it is important to back up all valuable files. This precaution means you don’t lose important documents, photos, or media. Consider using tools such as iCloud or an external storage device to save your data safely.
Your choice of file system determines how the drive behaves when transferring data. Options include FAT32, ExFAT, HFS+, and APFS. For instance, if you need the drive to work across different devices, choosing ExFAT is ideal. However, for a Mac-exclusive environment, APFS offers the best performance. This step is crucial when preparing your USB drive on Mac for different scenarios, like large file transfers or cross-platform use.

<p><strong>Why buy Environics Enviroglobe Anti Radiation Ball for House & Car</strong></p> <p> </p> <ul> <li><strong>Provides E-Smog and Radiation Protection</strong> for healthier homes and families</li> <li><strong>It Covers A Radius</strong> of 250 sq.ft protect you and your loved ones from harmful radiation</li> <li><strong>Clinically Tested EMF Harmonizer</strong> that provides us 360-degree protection from radiation sources that are beyond our control</li> </ul> <p> </p> <p>Buy the <strong>Environics Enviroglobe Anti Radiation Ball for House & Car</strong> which is based on Envirochip’s radiation protection technology that helps you protect you and your loved ones from harmful radiation within an area of 250 sq. feet. You can extend the range of protection by placing multiple Enviroglobes at equal distances from one another. It is a clinically tested EMF harmonizer and provides us 360-degree protection from radiation sources that are beyond our control. Electromagnetic Radiation (EMR) refers to the constant waves of the electromagnetic field (EMF) produced by wireless communication devices such as mobile phones, laptops, Wi-Fi routers, and other sources such as mobile towers and high-tension wirelines, etc. However, The human body is accustomed to random waves and hence the constant exposure to electromagnetic radiation causes serious biological disorders such as higher stress and fatigue, irritation, headache, weakened immunity, cancer, fertility issues to name a few. The technology used in Enviroglobe changes the nature of electromagnetic radiation from constant to random waveform making it human body-friendly.</p> <p> </p> <p>When you get <strong>Environics Enviroglobe Anti Radiation Ball for House & Car</strong> online, you also get awesome companion for your home. It comes with Internationally tested and certified technology. No need of batteries or adaptors, you can simply charge by placing it under the sunlight, for only a couple of minutes every week. Enviroglobe is simple to use. Simply place it at your desk, table, living room, bedroom, car, office space, absolutely wherever you want, and get a radiation protected zone of up to 250 sq. feet. It provides e-smog and radiation protection for healthier homes and families. Purchase <strong>Environics Enviroglobe Anti Radiation Ball for House & Car</strong> online, now!</p>
To start, open Finder, navigate to Applications, and then to Utilities. Here, you will find Disk Utility, the tool used to reformat your drive.
Follow these simple steps to format your USB drive on Mac:
Select your USB drive from the left panel in Disk Utility.
Click the Erase button.
Choose the appropriate file system format, such as ExFAT for cross-platform use or APFS for a Mac-only environment.
Name your drive appropriately.
Click Erase again to confirm the process.
This mac usb drive formatting guide will help you get through the process without any complications.
After formatting, check that your drive appears correctly in Disk Utility. If you see the new file system and the drive name you chose, the process was successful. This simple verification step clears any doubts about whether the drive was properly formatted.
Pro Tip: Choosing the Right File System for Your Needs
Did you know? ExFAT is the ideal file system for cross-platform use, while APFS offers optimized performance for Mac-only environments. Selecting the right file system can save you from compatibility headaches down the road!
If your USB drive does not appear in Disk Utility, first check that it is firmly connected. Trying a different port or restarting your Mac might resolve the issue. In some cases, drive corruption may be the cause and specialised recovery tools could be necessary.
Accidental data loss is a risk when you erase a USB drive on Mac. Data recovery tools may offer a solution, but always ensure you have a backup before formatting to avoid complicating this task.

<p>The <strong>Lyfro Battery Powered Disinfectant Solution Generator</strong> is non-toxic and has no side effects</p> <ul> <li><strong>Free of Chemical Residues</strong> makes it an eco-friendly, cost-effective disinfectant</li> <li><strong>Uses Electrolysis</strong> to produce natural powerful disinfectant</li> <li><strong>300 mAh Battery</strong> with USB recharging facility</li> </ul> <p>Buy <strong>Lyfro Battery Powered Disinfectant Solution Generator</strong> to experience its awesome usages. It is an ultra-portable non-toxic disinfectant maker. It comes with an electrolysed water generator. Useful to sterilize public places as well. Use <strong>Lyfro Battery Powered Disinfectant Solution Generator</strong> which allows you to create your own non-toxic disinfectant in just 3 minutes. Simply add salt and water together. Uses electrolysis to produce natural powerful disinfectants proven to be effective against bacteria, viruses, and mold.</p> <p>When you get <strong>Lyfro Battery Powered Disinfectant Solution Generator</strong> online, you also get an awesome eco-friendly, cost-effective disinfectant for your everyday life. It is equipped with a 300 mAh battery with USB recharging facility. It is usable at home, office, or in transit. It eliminates up to 99.9 percent pathogens. It is free of chemical residues. It is a self-made disinfectant.</p>
If you need to prepare a USB drive on Mac for different uses, such as reformat usb drive mac for Windows compatibility or clear USB storage on Mac for larger files, you can easily repeat the formatting process with a different file system choice.
Use the ExFAT file system, which works seamlessly across both Mac and Windows environments.
APFS is best for Mac-exclusive use, while ExFAT is recommended for cross-platform compatibility.
No, erasing a USB drive is an integral part of the formatting process that resets the file system and clears all data.
Ensure the USB drive is properly connected, try a different port, or restart your Mac. Persistent issues might require further investigation or recovery tools.
Yes, you can format a USB drive using the terminal with the diskutil command; however, Disk Utility remains the most user-friendly option for most users.
Formatting a USB drive on Mac is straightforward when you follow the clear steps provided by Disk Utility. By backing up your data and choosing the correct file system, you can ensure that your drive is ready for any new project or renewed use. Remember, whether you need to erase a USB drive on Mac for Windows compatibility or simply want to clear USB storage on Mac, this guide aims to simplify the process. Enjoy the ease and convenience that tools like Tata Neu offer, along with benefits such as earning NeuCoins with your transactions and experiencing express delivery for your urgent tech needs.
