Home Appliances
•04 min read

<p>Danger can overpower you at any time and your voice will not be enough in such situations to get the required aid. The amazing new <strong>Juvo PSB01 Personal Alarm</strong> is crafted for all ages and is a necessary precaution from all kinds of danger. It rings a very loud alarm at 120 dB as well as flashes the torch to warn people nearby about a danger. Whether you have a medical emergency or you are attacked by predators your voice may not be heard but this alarm will be enough to deter attackers or draw attention of people close by to give you the immediate assistance required.</p> <p><strong>Extremely Easy To Use</strong></p> <p>The <strong>Juvo PSB01 Personal Alarm</strong> is small and portable, can be attacked to even a keychain if you want. To start the siren all you need to do is separate or pull the metal key chain from the main black unit. The siren may go on for 1 1/2 hours in case nobody heard it in the first minutes. This is very important for girls returning home alone at night as it acts as a security anti-attack panic alarm that is sure to scare off a molester. Its easy portability accentuates its use.</p> <p><strong>Lights Your Way</strong></p> <p>The little and portable <strong>Juvo PSB01 Personal Alarm</strong> also features a small LED torch that helps you find your way in the dark. Don’t be scared of dark alleys when you have this with you because it is equipped to save you from all dangers.</p>
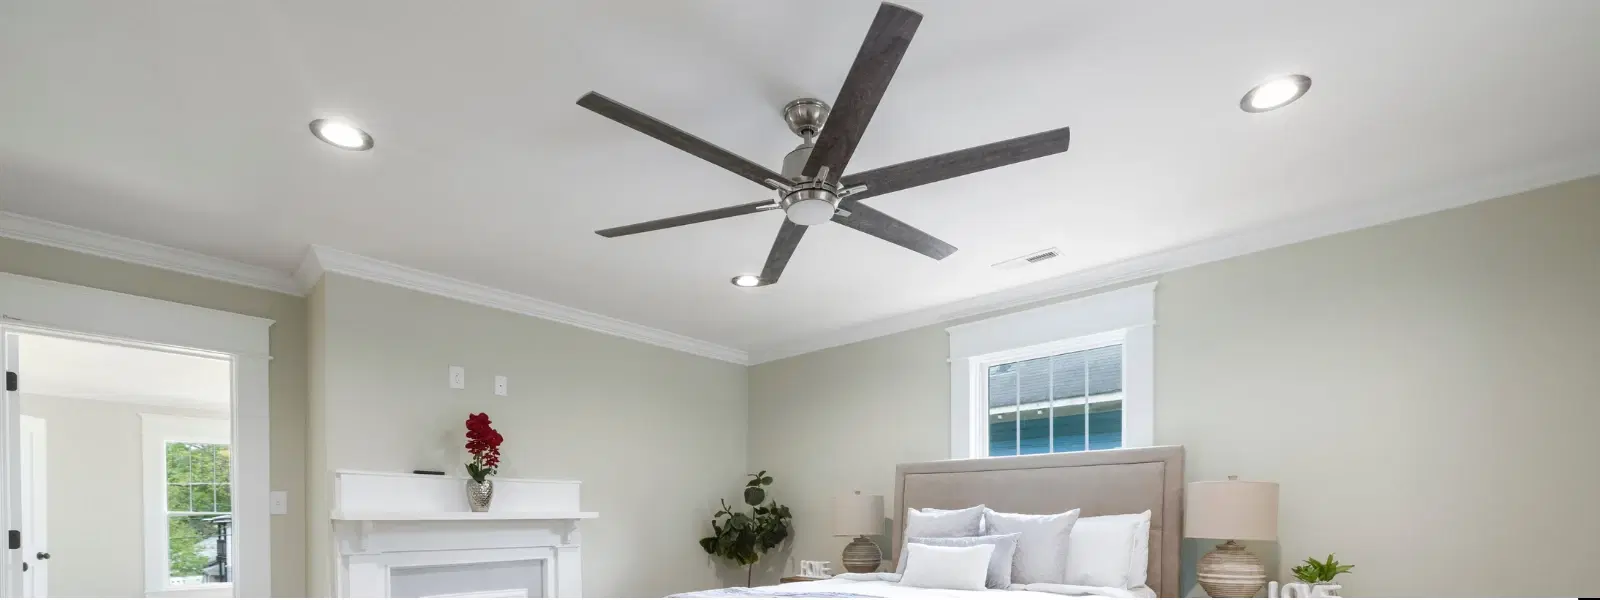
Is your ceiling fan not performing as it should? A faulty capacitor may be the root cause. In this guide, you will learn what a fan capacitor is, why it plays a crucial role in fan performance, and how to replace a defective capacitor. This step-by-step tutorial is designed to help you troubleshoot, identify, and carry out the replacement procedure with ease, ensuring your fan runs efficiently and quietly.
A ceiling fan capacitor is a small device that helps manage the electrical current necessary for the operational speed and performance of a fan. Essentially, the capacitor acts as a reservoir that stores and releases electrical energy, enabling the fan to start smoothly and maintain consistent speed. When the capacitor begins to fail, you may notice variations in how fast the fan spins or other performance issues, making it essential to address the problem early on. This small component is not just for fans, but also functions similarly in many home appliances.
Before you start any repair work, be aware of common symptoms that indicate a failing capacitor. Reduced fan speed, unusual humming noises, or complete failure to start are strong indicators of an electrical hiccup. If you experience any of these issues, it’s a clear sign that fan capacitor troubleshooting should be your next step. Recognising older parts and wear may help in preventing prolonged performance issues with your fan.
Replacing a capacitor isn’t complicated, but having the right tools makes the process smooth and safe. The essential tools include a screwdriver for opening the fan assembly, pliers for safely detaching wires, and of course, a replacement capacitor that matches the specifications of your previous part. When checking for new parts, keep an eye on Crompton fan replacement parts and remember that selecting the best capacitor for fans ensures peak performance.
Safety is paramount when dealing with electrical components. Before commencing the replacement process, turn off the power supply to the fan by switching off the circuit at the main board. Use insulated tools to prevent any accidental electrical shocks. Always double-check that no power is reaching the unit before touching any wires. These precautions are essential to ensure a secure work environment and prevent any mishaps.

<p><b>HEUV Technology</b><br/><br/>Thanks to the HEUV technology, the SVARAS Home X2 Pro UV Steriliser effectively targets and eliminates a wide range of viruses and bacteria, including those responsible for illnesses such as the coronavirus. As a result, you can have peace of mind knowing that you can effectively protect yourself and your family from potential health threats.<br/><br/><br/><b>Enhanced Sterilisation</b><br/><br/>This rechargeable UV steriliser provides optimal sterilisation capabilities, which eliminates harmful germs. This high level of effectiveness makes it an ideal choice for homes, offices, and shops, ensuring that surfaces remain clean and safe. Thus, you can trust this steriliser to protect your health and the health of your loved ones by efficiently disinfecting various surfaces.<br/><br/><br/><b>User-Friendly Functionality</b><br/><br/>This home steriliser boasts convenient features that enhance its usability. It includes a voice alarm that signals when the sterilisation process is complete, ensuring you never forget to turn it off. Additionally, the device offers a safe automatic power-off feature, which enhances safety during operation. Convenient charging capabilities further simplify the user experience, which makes it easy to keep the steriliser ready for action.<br/><br/><br/><b>Eco-Friendly Design</b><br/><br/>Designed with sustainability in mind, this SVARAS steriliser promotes an eco-friendly lifestyle. It operates without mercury or harsh chemicals, which makes it safe for both users and the environment. This design choice allows you to maintain a clean living space while reducing your ecological footprint. Moreover, the sleek, modern appearance of the steriliser ensures that it complements any decor.</p>
The capacitor is typically found within the fan’s motor casing. Begin by carefully removing the fan cover to access the internal wiring. Look for a small, cylindrical component connected to the wiring harness. A fan capacitor wiring diagram, often provided in the fan's manual, can be incredibly helpful in correctly identifying the capacitor’s location. Visual cues like the component’s shape and size will guide you in determining the precise position.
Once the capacitor is located, the next step is to disconnect the defective unit. Note how the wires are connected before labeling them for easier identification during installation. Using your pliers, carefully remove the wires while ensuring that you do not damage them in the process. It is wise to work slowly and methodically, fully documenting the arrangement of the wires for a seamless replacement.
Place the new capacitor into the same slot where the old one was previously installed. Connect the wires following your documented notes, preferably double-checking each connection to avoid any mistakes. Secure the new capacitor firmly and reassemble the fan cover. Proper wiring and secure placement are vitally important as even a minor error can affect the fan’s performance. Taking your time during this stage enhances the longevity of your new component.
Did you know? Using the wrong capacitor value can affect your fan’s speed and efficiency. Always check the manufacturer’s specifications to ensure compatibility. For fans with well-known performance histories, consult your user manual or opt for genuine replacement parts for optimal results.
After installing the new capacitor, restore the power supply and test the fan’s operation. Observe if the fan starts correctly and runs at a consistent speed. Take note of any unusual sounds or fluctuations in performance. Ensuring that the new capacitor is functioning as intended is a vital step in Crompton ceiling fan maintenance.

<p><strong>Why buy Environics Enviroglobe Anti Radiation Ball for House & Car</strong></p> <p> </p> <ul> <li><strong>Provides E-Smog and Radiation Protection</strong> for healthier homes and families</li> <li><strong>It Covers A Radius</strong> of 250 sq.ft protect you and your loved ones from harmful radiation</li> <li><strong>Clinically Tested EMF Harmonizer</strong> that provides us 360-degree protection from radiation sources that are beyond our control</li> </ul> <p> </p> <p>Buy the <strong>Environics Enviroglobe Anti Radiation Ball for House & Car</strong> which is based on Envirochip’s radiation protection technology that helps you protect you and your loved ones from harmful radiation within an area of 250 sq. feet. You can extend the range of protection by placing multiple Enviroglobes at equal distances from one another. It is a clinically tested EMF harmonizer and provides us 360-degree protection from radiation sources that are beyond our control. Electromagnetic Radiation (EMR) refers to the constant waves of the electromagnetic field (EMF) produced by wireless communication devices such as mobile phones, laptops, Wi-Fi routers, and other sources such as mobile towers and high-tension wirelines, etc. However, The human body is accustomed to random waves and hence the constant exposure to electromagnetic radiation causes serious biological disorders such as higher stress and fatigue, irritation, headache, weakened immunity, cancer, fertility issues to name a few. The technology used in Enviroglobe changes the nature of electromagnetic radiation from constant to random waveform making it human body-friendly.</p> <p> </p> <p>When you get <strong>Environics Enviroglobe Anti Radiation Ball for House & Car</strong> online, you also get awesome companion for your home. It comes with Internationally tested and certified technology. No need of batteries or adaptors, you can simply charge by placing it under the sunlight, for only a couple of minutes every week. Enviroglobe is simple to use. Simply place it at your desk, table, living room, bedroom, car, office space, absolutely wherever you want, and get a radiation protected zone of up to 250 sq. feet. It provides e-smog and radiation protection for healthier homes and families. Purchase <strong>Environics Enviroglobe Anti Radiation Ball for House & Car</strong> online, now!</p>
To prevent future issues, it’s important to conduct regular maintenance checks on your fan. Clean the blades and inspect the wiring and capacitor periodically. Simple steps like these can extend the lifespan of the components. For consistent performance and to avoid recurring trouble in fan capacitor troubleshooting, consider scheduling a regular review and cleaning process.
Watch for signs like reduced fan speed, persistent humming noises, or the fan failing to start at all.
Typically, most ceiling fans require capacitors with values ranging from 1.2 µF to 4 µF, based on the model’s specifications.
No, capacitor values differ among various fan models. Always refer to the specific fan manual for accurate information.
It is not advisable as using a mismatched capacitor value can compromise performance and potentially reduce the longevity of the fan.
Replacing a fan capacitor is a straightforward process when approached with the proper knowledge, tools, and adherence to safety precautions. By following this guide, you will be well-equipped to address performance issues and ensure your fan continues to operate smoothly. As you enhance your home maintenance skills, remember that technical expertise can also contribute to more efficient everyday living. Enjoy the benefits of watching your appliances work at their best, while making smart decisions with trusted guidance.
This guide is brought to you with the inspiring support of a platform dedicated to creating seamless shopping experiences. By choosing products that focus on quality and service excellence, you are not only making a wise investment but also taking steps towards a more efficient, tech-savvy lifestyle. From express delivery that ensures your supplies arrive promptly to expert guidance on technical repairs, every decision is geared towards enhancing your daily living experience.
