Home Appliances
•05 min read

<p>The <strong>Lyfro Battery Powered Disinfectant Solution Generator</strong> is non-toxic and has no side effects</p> <ul> <li><strong>Free of Chemical Residues</strong> makes it an eco-friendly, cost-effective disinfectant</li> <li><strong>Uses Electrolysis</strong> to produce natural powerful disinfectant</li> <li><strong>300 mAh Battery</strong> with USB recharging facility</li> </ul> <p>Buy <strong>Lyfro Battery Powered Disinfectant Solution Generator</strong> to experience its awesome usages. It is an ultra-portable non-toxic disinfectant maker. It comes with an electrolysed water generator. Useful to sterilize public places as well. Use <strong>Lyfro Battery Powered Disinfectant Solution Generator</strong> which allows you to create your own non-toxic disinfectant in just 3 minutes. Simply add salt and water together. Uses electrolysis to produce natural powerful disinfectants proven to be effective against bacteria, viruses, and mold.</p> <p>When you get <strong>Lyfro Battery Powered Disinfectant Solution Generator</strong> online, you also get an awesome eco-friendly, cost-effective disinfectant for your everyday life. It is equipped with a 300 mAh battery with USB recharging facility. It is usable at home, office, or in transit. It eliminates up to 99.9 percent pathogens. It is free of chemical residues. It is a self-made disinfectant.</p>
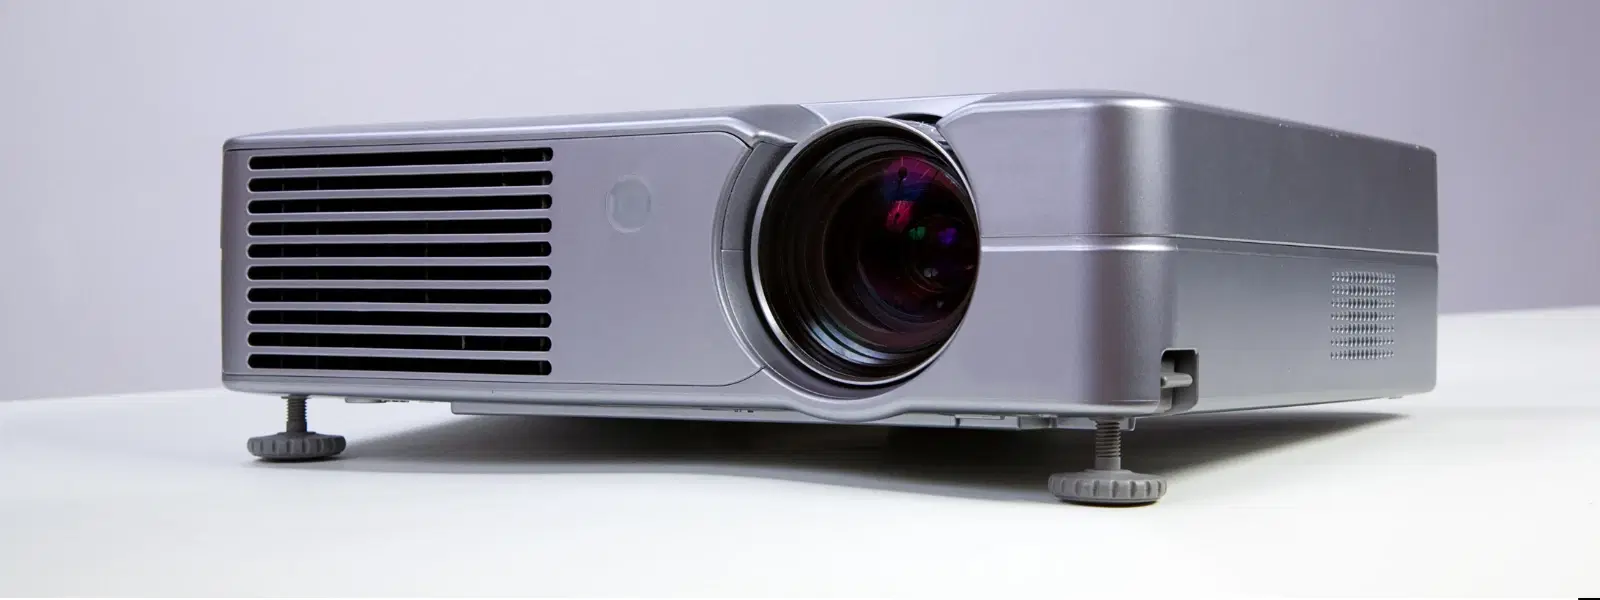
Ever wondered how an LCD projector brings your favourite movies, presentations, or games to life? Understanding its inner workings begins with decoding its diagram. In this guide, you'll learn how to read an LCD projector diagram, identify key components, and appreciate how each part contributes to a clear and vibrant projection. Whether you're setting up a home theatre or preparing for professional presentations, understanding the intricacies of your device can simplify assembly, troubleshooting, and maintenance.
An LCD projector diagram is a detailed illustration that breaks down the inner components of the projector. It serves as a blueprint for understanding the device's assembly and functioning. By analysing this diagram, users can pinpoint the roles of various components, making it easier to set up the projector and troubleshoot common issues. The diagram typically includes labels for optical components, electronic circuitry, and mechanical parts, providing a comprehensive overview of the projector's inner workings.
Reading the diagram not only aids in a successful setup but also enhances your ability to diagnose issues and maintain the device over time. Many diagrams are designed to show variations such as wiring configurations and circuit explanations, ensuring that even beginners can grasp the operational pathways involved.
At the heart of an LCD projector are several key components, each playing its own vital role in creating the final projected image. Understanding these parts can make troubleshooting and maintenance much simpler.
Optical components include lenses, mirrors, and prisms. These parts work in unison to focus and direct light accurately, ensuring that the image is sharp and clear on your display surface.
Electronic parts such as circuit boards, LCD panels, and connectors are central to processing the image. The LCD panels modulate the light passing through them, while the circuit boards manage signal processing and power distribution.
These include cooling fans, the outer housing, and mounting brackets. They ensure that the projector operates within the right temperature range and is safely secured, contributing both to performance and longevity.
Imagine a diagram where each of these components is clearly labelled. For example, a line might connect the LCD panels to the circuit board, highlighting their interdependency. This simplified representation not only builds confidence but also empowers you to handle common repairs or simple adjustments on your own.
Expert Tip from Tata Neu: When troubleshooting your LCD projector, always start with the diagram. It’s your roadmap to pinpointing issues like loose connections, faulty parts, or incorrect settings.
The operation of an LCD projector is a beautiful interplay of light and technology. At the core, the projector channels a powerful light source through a series of components designed to modify and process the image before it is displayed.

Retrieving data. Wait a few seconds and try to cut or copy again.
The journey begins with the light source, which emits a bright beam. This light passes through a complex maze of optical elements that concentrate and guide it through the projector. The diagram visually demonstrates the route, highlighting how the light travels through lenses, filters, and reflective surfaces.
Once the light reaches the LCD panels, it undergoes modulation. These panels, forming a core part of the electronic system, block or allow light through tiny segments to form an image. This process is clearly marked in the diagram, bridging the gap between theory and practical functionality.
The final stage involves the lens system which enlarges and projects the image onto a screen. Each component in this sequence plays a distinctive role in ensuring that the image remains crisp and accurately reproduced.
This step-by-step mapping provided by the lcd projector diagram makes it easier to understand how light transforms into the images you enjoy every day.
A wiring diagram is a specific type of illustration that focuses on the electrical connections within your projector. It shows how components such as the power supply, HDMI inputs, USB ports, and LAN connectors are interlinked.
Each wiring diagram contains symbols representing various electrical elements. These symbols, whether for a resistor, capacitor, or connector, help demystify the electrical layout of the device. New users will find that once these symbols become familiar, the entire figure transforms into a helpful schematic guide.
For instance, when connecting your projector to a computer or external device, the wiring diagram directs your attention to specific input ports—be it an HDMI or VGA connector. The diagram provides a visual reference to ensure connections are made correctly, enhancing both device reliability and performance.
Even the most well-maintained LCD projectors can encounter issues over time. The pdf projector diagram becomes your indispensable friend for diagnosing and resolving these issues. Common problems include loss of image, distorted colours, or power failures. Each of these can be traced back to potential faults identified on the diagram.
Regular cleaning of the lenses and air filters, along with checking all wiring connections, forms a part of routine maintenance. When using the diagram, you can easily locate and inspect components that might have degraded, ensuring your projector remains in optimal condition. By revisiting the lcd projector diagram periodically, even beginners can grow confident in maintaining their technology.

<p><strong>Effortless Performance</strong><br /> <br /> The sabichi Mono 24cm Whisk is designed for smooth and efficient whisking. Its polished stainless-steel wires and narrow shape ensure even blending and make it ideal for small bowls or containers. From whipping meringues to beating eggs, this whisk brings ease to every task.<br /> <br /> <br /> <strong>Versatile Whisking Tool</strong><br /> <br /> Whether you're blending batters, keeping lumps out of sauces, or creating airy meringues, this 24cm whisk is up to the challenge. It’s a kitchen essential that adapts to various culinary needs with precision and consistency.<br /> <br /> <br /> <strong>Safe for All Cookware</strong><br /> <br /> The whisk is gentle on all surfaces, including non-stick, ceramic, and metal cookware. You can whisk worry-free without scratching or damaging your kitchenware. This ensures long-lasting durability for your pots and pans.<br /> <br /> <br /> <strong>Ergonomic Design</strong><br /> <br /> Featuring an innovative handle with a soft, comfortable grip, this whisk absorbs pressure for strain-free usage. Its contoured shape ensures a secure hold, even during prolonged whisking tasks, for an effortless cooking experience.<br /> <br /> <br /> <strong>Convenient Storage</strong><br /> <br /> Equipped with a handy hanging loop, the whisk offers easy storage. It’s always within reach while saving counter and drawer space, making it as practical as it is efficient.</p>
For many, setting up a home projector might seem daunting. However, armed with the right diagram, the process becomes straightforward and enjoyable. The diagram simplifies assembly by clearly showing where each component fits, from the initial mounting of the device to final cabling connections.
Once the basic assembly is complete, you have the freedom to customize your setup. Optimise projector placement by considering light paths and ensuring unobstructed views, as detailed in the diagram. This clarity proves invaluable especially when integrating additional devices or planning an upgrade to accommodate new technologies. The detailed schematic not only reinforces correct assembly but also builds confidence in future-proofing your home projector setup.
The main parts include the light source, LCD panels, lenses, cooling system, circuit boards, and input connectors.
Light from the source passes through optical and electronic components that modulate it into a clear image, which is then projected using a lens system.
Consult the wiring diagram to identify the correct input port and then use the appropriate cable connection, such as HDMI or VGA.
It helps identify faulty connections, broken circuits, or incorrect wiring that might be causing operational issues.
Regularly cleaning key components, checking all connections, and referring to the diagram for troubleshooting ensures longevity and optimal performance.
Understanding an lcd projector diagram can significantly enhance your ability to set up, troubleshoot, and maintain your projector in both home and professional settings. The straightforward explanations of component functions and wiring details not only demystify the technology but also empower you with the skills to handle basic repairs and upgrades yourself. With a clear guide in hand, you can now approach your projector assembly with confidence, ensuring a seamless experience from setup to regular maintenance. This approach mirrors the philosophy of Tata Neu, which is all about making your tech experiences rewarding and hassle-free through expert guidance and thoughtful innovation.
Armed with the insights from this guide, you are now better prepared to delve into the world of projector technology. Whether you are a tech enthusiast or someone setting up a home theatre for family entertainment, utilising the lcd projector diagram adds clarity and control to your tech journey. Enjoy the enhanced functionality, precise troubleshooting, and long-term benefits, all while experiencing the promise of quality and care that your technology deserves.
