Consumer Electronics
•05 min read
Buy VEGA U Style Hair Dryer with 3 Heat Settings & Cool Shot (Foldable Handle, Black and Blue) online at best prices from Croma. Check product details, reviews & more. Shop now!
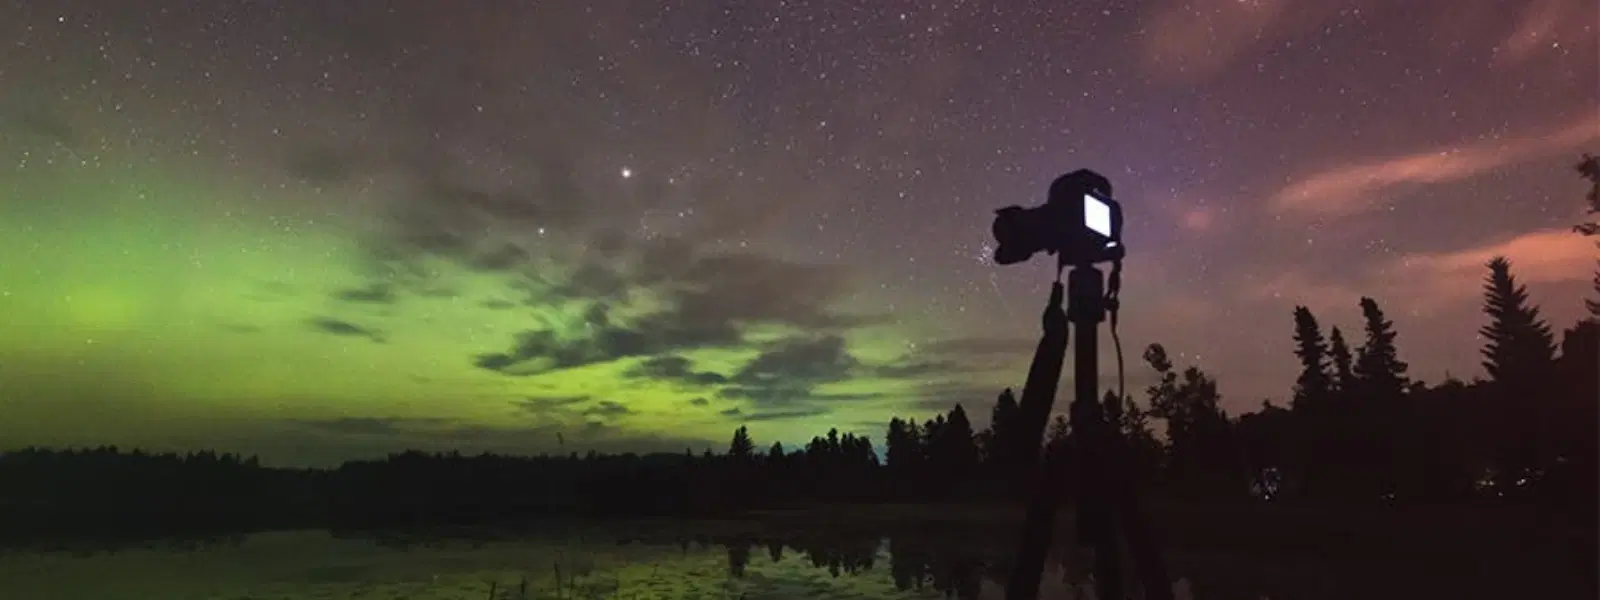
Capturing the beauty of the night sky isn't just about pointing your camera upward—it's about mastering the perfect astrophotography settings to unlock the universe's secrets. Astrophotography is a rewarding art form that requires a good understanding of key camera settings. This guide will teach you how to optimise your camera settings to take breathtaking photos of the night sky. You will learn about ISO, shutter speed, aperture, manual focus, and noise reduction techniques, as well as advanced long exposure methods.
Camera settings directly impact the clarity, brightness, and detail of your starry captures. Shooting in low light comes with challenges such as motion blur and an increase in sensor noise. By adjusting your settings thoughtfully, you can overcome these hurdles and capture a night sky that truly reflects its celestial beauty.
Alongside the right camera settings, having the proper gear makes all the difference. A sturdy tripod is essential for long exposures, while a wide-angle lens helps capture expansive vistas of the heavens. A camera with manual control allows you to experiment with each element, ensuring that your photos are precisely what you envision. Additional tools like a remote shutter release help minimise vibrations and star trackers can be invaluable for longer sessions.
In low light conditions, ISO plays a crucial role. Increasing the ISO makes your camera sensor more sensitive to light, letting you capture the subtle details of distant stars. A common guide for astrophotography is to use an ISO range between 800 and 3200. However, keep in mind that higher ISO values can increase noise, which is why balancing sensitivity with image clarity is crucial.
One of the most useful tips in astrophotography is the use of the 500 Rule. This rule helps you calculate the maximum shutter speed to use in order to prevent star trails from blurring your shot. To apply the rule, divide 500 by the focal length of your lens. For instance, if you are using a 20mm lens, your shutter speed should be around 25 seconds at the maximum. This rule is a great starting point but always check the actual conditions at your location.
The lens aperture determines how much light enters the camera. For astrophotography, a wide aperture, such as f/2.8 or lower, is highly recommended. This setting allows more light to hit the sensor and is essential for capturing the faint light of celestial objects. While a wide aperture may reduce the depth of field, in astrophotography this trade-off is acceptable when compared to the need to gather enough light for a clear image.
Buy Croma 2200 W Hair Dryer with 3 Heat Setting and Cool Shot Function (Overload function, Black) online at best prices from Croma. Check product details, reviews & more. Shop now!
Auto-focus often struggles in low light, so mastering manual focus is key. Begin by switching your camera to manual focus mode. Use the live view feature and zoom in on a bright star to fine-tune your focus. This technique ensures that your stars are sharp and appear as precise points of light rather than blurry smudges.
One of the most common issues when focusing in the dark is that the stars may not appear as clear as expected. In such cases, try focusing on a bright star in your composition. Tools like a Bahtinov mask can also be helpful. They are designed to create diffraction patterns that make it easier to achieve pinpoint accuracy with your focus.
Pro Tip: Unlocking Stellar Sharpness
Did you know? Focusing in the dark can be tricky, but using a bright star as your reference point and magnifying it in live view can help you achieve pinpoint accuracy. Always double-check your focus before taking the shot to avoid disappointment later.
Balancing exposure for night photography means carefully harmonising ISO, shutter speed, and aperture. Too much exposure can lead to washed-out images, while too little exposure leaves the scene dark and lacking detail. Always aim for a balanced exposure, and adjust your settings gradually. Taking test shots in the field is a good practice, allowing you to maximise light capture without compromising image clarity.
Noise can be a significant issue when shooting at high ISO levels. Many modern cameras come with in-camera noise reduction settings that can help smooth out the grainy texture. Additionally, post-processing techniques such as stacking multiple images can reduce noise further. This method combines several shots of the same scene, averaging out fluctuations and revealing a clearer picture of your starry masterpiece.
Long exposure settings allow you to capture faint celestial objects like distant stars, galaxies, and the shimmering Milky Way. This technique is especially useful when the scenery is dark and the stars are less visible to the naked eye. It is important, however, to minimise motion blur by using a sturdy tripod and remote shutter release. Long exposure adds a dramatic, surreal quality to your images, accentuating the vastness of space.

Buy HAVELLS Capture 650 Watt 1.2 Litre Multi Cook Electric Kettle with Auto Shut Off (Light Green) online at best prices from Croma. Check product details, reviews & more. Shop now!
One exciting creative option is star trail photography, where long exposure captures the circular motion of stars across the sky. To enhance these effects, experiment with including landscape elements such as trees, buildings, or mountains as the foreground. This not only adds depth to your composition but also fuses artistic storytelling with technical skill.
If you are new to astrophotography, start by switching your camera to manual mode. Set your camera to its widest aperture setting and choose an ISO between 800 and 3200 based on your scene’s brightness. Next, use the 500 Rule to calculate the optimum shutter speed. Finally, switch to manual focus and use live view to double-check that your stars are sharply defined. A stable tripod is essential throughout these steps to avoid any movement during longer exposures.
Not all locations are the same when it comes to night sky photography. Urban areas with high light pollution require some adjustments compared to remote sites. For instance, you might need to lower your ISO slightly or choose a shorter shutter speed to cope with extra ambient light. Similarly, celestial events like a moonlit sky versus an entirely dark sky call for careful setting tweaks. Always experiment and adjust based on your immediate conditions to capture the best possible shot.
Using a wide aperture (f/2.8 or lower), a high ISO (800-3200), and calculating shutter speed with the 500 Rule are recommended starting points.
This rule helps determine the maximum shutter speed to avoid star trails by dividing 500 by the focal length of your lens.
It depends on your camera's performance, but generally, ISO values between 800 and 3200 yield great results when balancing light sensitivity with noise reduction.
Begin by switching to manual mode, setting your lens to its widest aperture, selecting a high ISO, calculating your shutter speed using the 500 Rule, and finally, switching to manual focus with the assistance of live view and a stable tripod.
Mastering astrophotography settings is the key to transforming your night sky shots into breathtaking works of art. With a solid understanding of ISO, shutter speed, aperture, and focusing techniques, you can overcome common challenges and capture the universe in all its glory. Take what you have learned here, experiment under the stars, and discover the magic inherent in every night sky. Trust in your camera and skills much like Tata Neu’s trusted and rewarding experience helps you manage everyday shopping needs with ease and convenience. Enjoy the journey of astrophotography as you save NeuCoins for every successful capture, ensuring you benefit every time you explore, much like the seamless rewards offered on Tata Neu.
