Consumer Electronics
•04 min read

Buy HAVELLS Capture 650 Watt 1.2 Litre Multi Cook Electric Kettle with Auto Shut Off (Light Green) online at best prices from Croma. Check product details, reviews & more. Shop now!
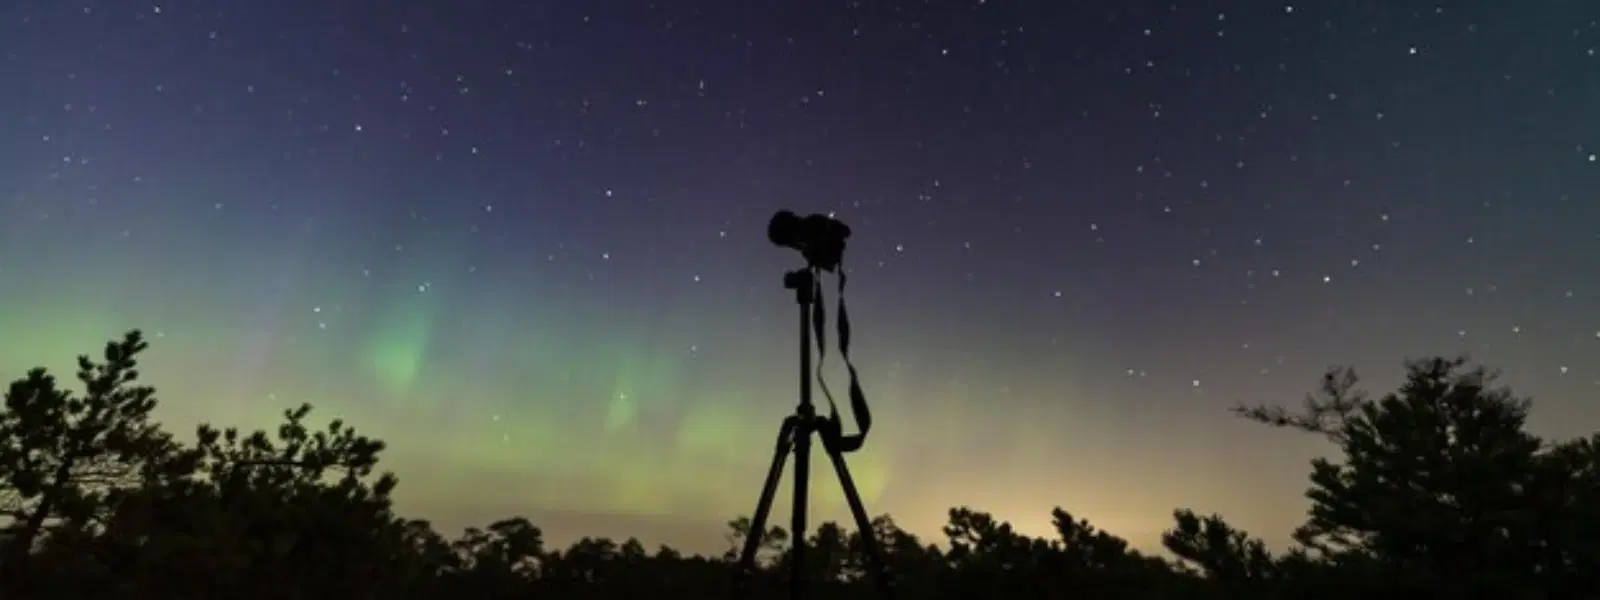
Imagine capturing the breathtaking beauty of the night sky—stars glittering like diamonds against a velvet backdrop. Star photography is a captivating art that blends technical precision with creative vision. Whether you're drawn to the sweeping beauty of the Milky Way or fascinated by the delicate dance of star trails, this guide is designed to help you master the craft of night sky photography. In the following sections, you will learn how to prepare for your shoot, set your camera up for low light conditions, apply advanced techniques, and edit your photos for a polished final image.
Investing in the best camera for astrophotography is key to capturing sharp, detailed images of the night sky. Both DSLR and mirrorless options offer benefits when paired with a high-quality wide-angle lens that is perfect for capturing expansive vistas. A sturdy tripod is essential to ensure stability during those long exposure sessions. Additionally, remote triggers and intervalometers reduce the risk of camera shake, allowing you to focus on the beauty above.
When venturing out for night sky photography, the first hurdle is often light pollution. Choosing dark sky locations ensures that your images are free from unwanted ambient light that can wash out the stars. Tools such as online maps or astronomy apps can guide you to spots where the Milky Way and other celestial elements are most visible. It’s also vital to consider the phase of the moon, as a brighter moon may interfere with your long exposure photography.
Effective planning can dramatically improve your star photography experience. Look at weather forecasts to choose nights with clear skies over those that are partly cloudy. Timing is crucial—early hours before the moon rises or when it is not visible are ideal for capturing the true essence of astrophotography. Don't forget to scout your foreground; interesting elements such as mountains, trees, or architectural silhouettes can add depth and context to your composition.
Your camera settings play a crucial role in capturing crisp and vibrant star images. Adjusting the ISO is your first step; while high ISO boosts brightness, it can also introduce noise. Finding the right balance is essential. For shutter speed, the 500 Rule is a trusted guide: divide 500 by your lens's focal length to determine the maximum duration to avoid star trails, unless you’re intentionally going for them. Aperture settings come next—typically a lower f-stop is preferred to capture more light and reveal minute details in the stars.
When you venture into long exposure photography, noise reduction becomes a must. Manual focus gives you sharper star images, eliminating the risk of blurry photos due to auto-focus struggles in the dark. Additionally, setting the white balance correctly ensures that the colours of the night sky appear natural rather than overly cool or warm.

Buy BRAUN FS1000 Cordless Wet & Dry Trimmer for Upper Lips, Chin & Cheeks for Women (With Smart light, White) online at best prices from Croma. Check product details, reviews & more. Shop now!
Expert Tip: The 500 Rule Made Simple
Did you know? The 500 Rule helps you avoid star trails when photographing the night sky. Simply divide 500 by your lens’s focal length to determine the maximum shutter speed for crisp, clear stars.
Capturing the Milky Way is one of the most sought-after aspects of star photography. Use astronomy apps to pinpoint its location in the sky. Consider foreground elements that complement the galactic display such as rugged landscapes or serene water bodies. This enhances the overall composition and transforms your image into a narrative of both celestial and earthly beauty.
Shooting stars are fleeting and require a mix of timing, patience, and the right camera settings. Engage burst mode on your camera to capture multiple frames in quick succession, increasing your chances of nabbing that perfect shot. Planning your shoots around meteor showers can also enhance your success rate, as these events naturally offer more shooting opportunities.
If you wish to create mesmerising star trails, try capturing multiple exposures over an extended period. Stack them later using software to create a seamless flow of light streaks that convey the Earth's rotation. This technique not only highlights the movement of the stars but also lends an artistic perspective to your astrophotography.
The work doesn't end once the shutter clicks. Post-processing is a crucial step in refining your images. Adjust exposure levels, enhance contrast, and balance colours to give your star photos a natural yet dramatic look. Noise reduction software like Lightroom or Photoshop can help eliminate any unwanted grain, ensuring that the stars shine bright and clear.
Advanced editing techniques can further elevate your images. Use masks to selectively enhance star brightness or add dramatic effects to the Milky Way. Playing around with these settings allows you to fine-tune the intricate details of your night sky photography, making every subtle nuance stand out.

Buy PHILIPS 3 Series Rechargeable Cordless Shaver for Beard for Men (40mins Runtime, 4D Floating Heads, Celestial Blue) online at best prices from Croma. Check product details, reviews & more. Shop now!
Star photography is commonly referred to as astrophotography, which involves capturing celestial objects and phenomena in the night sky.
To photograph stars, you need a camera capable of manual settings, a stable tripod, and a dark location. Adjust the ISO, shutter speed, and aperture for optimal results, and use long exposure techniques.
The 500 Rule is a guideline for avoiding star trails. Divide 500 by the focal length of your lens to determine the maximum shutter speed for crisp photos.
Use a phone camera equipped with manual settings or an astrophotography mode. Ensure you use a tripod for stability, increase the ISO, and set a longer exposure time for better results.
Ideal conditions include dark skies with minimal light pollution, clear weather, and a new moon to minimise brightness interference.
Capturing stunning stars in low light conditions is a rewarding experience that blends technical skill with creative artistry. By choosing the right gear, planning your shoot meticulously, and mastering both your camera settings and post-processing techniques, you can elevate your night sky photography to new heights. Remember, the journey to perfect astrophotography is as magical as the celestial scenes you are striving to capture. Embrace the process, refine your techniques over time, and most importantly, enjoy the serenity and beauty of the night sky.
Alongside your photographic pursuits, you can explore premium gadgets and home appliances on Tata Neu. The platform offers an automatic reward of NeuCoins with every purchase, adding extra value to your experience. Whether shopping online or exploring in-store, enjoy seamless, customer-first experiences backed by trust and technology. With benefits like express delivery and expert support, Tata Neu stands as a reliable partner in your journey to creating your best work – both on and off camera.
